DIY Wire Dragonfly Napkin Rings
How to Make DIY Wire Dragonfly Napkin Rings
This DIY wire dragonfly is the perfect craft for a warm summer day. Dragonflies are so whimsical and beautiful with those flashing translucent wings and helpful nature. Not only are they wonderful to watch, but they are perfect themed for a summer craft idea.
These DIY wire dragonflies are easy enough to make with young teens. You can use them on plants, as part of a bracelet, hang them in the window to catch the light or add them to a napkin ring like I did.
DIY Wire Dragonfly Tutorial
Step 1 – Gather Supplies
Here are the supplies you need to make the dragonfly.
- Pencil and paper
- 24 gauge jewellery wire
- Something small and round, I used a chopstick or small thin doweling
- Needle nose pliers and wire cutters
- Small paintbrush
- Lepage clear glue
- Assorted nail polish, at least two colors
- Toilet paper roll or a spice jar
Step 2 – Draw a Simple Dragonfly Shape
Start by drawing a really simple dragonfly pattern. Use the photo as a general guide and then draw your dragonfly any size you like. You can use any number of circles you want for the body and you only need one wing. You can make your dragonfly to the size you need, mine is 2.5 inches long. Draw both the dragonfly body and the wing as one single twisting line. This is to mimic the wire you will bend to follow your shape.

Step Three – Make the Wire Dragonfly Body
The body of the dragonfly consists of three circles with pinch points between them.
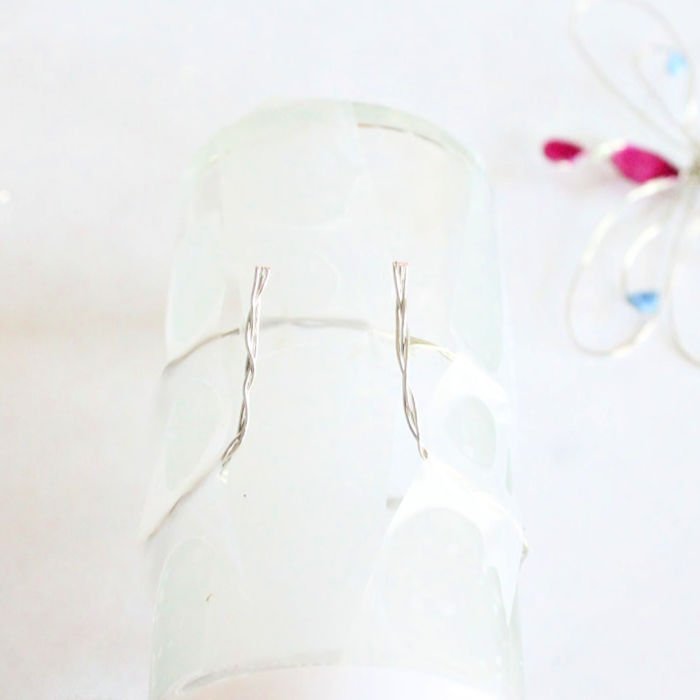
Begin by cutting a foot or more of the wire. Starting at the tail end, pinch the end of the wire with needlenose pliers, then wrap the wire around the end of the pliers. Slide off. Once you have the little curled end, form a simple twist with your fingers or follow the drawing. It does not need to be exact.

Pinch the end of the tail curl between your thumb and a small dowel and wrap the wire around to the other side, shaping half a circle.

When you have the circle finished, clamp a little bit of the wire with needlenose pliers. Bend the rest of the wire upwards, remove the pliers, and repeat by wrapping the wire around the dowel again.
Repeat these steps until you have four of the half-circle wires.

Once you have the four half circles, pinch the top one closed and wrap the wire around the flat space. This will form the head.

Continue working your way down the other side of the dragonfly’s body. Insert a dowel in the space of the first half circle, wrap the wire around the dowel, and then around the straight portion between each half circle. Repeat until you reach the end. Once you reach the end cut off any excess wire and make a small twist at the end of the wire to finish it.

In the above photo, you can see that the final product isn’t exactly like the drawing, but it is very similar. By using the dowels and the end of the needle nose pliers, I was able to make each circle and spacing relatively the same.

Step 5 – How to Make the DIY Wire Dragonfly Wings
Start with at least a foot of wire to make each dragonfly’s wings. Bend the wire in half and wrap the center of the wire around the spine of the dragonfly.

To form the wings work them free form by folding them over into the wing shape of your pattern. Wrap the wire around the body of the dragonfly and then up to form the center of the wing. Trim the wire a bit longer than the wing and then curl the end with needle nose pliers. You can use the drawing as a template if you find it easier.

Repeat the process for the second set of wings.
Although bending the wire for the dragonfly takes several steps, it’s very quick to do. Once you have the method done it took me ten minutes to wrap one.
Step 6 – Painting the Wire Dragonfly
To paint the dragonfly you need clear a small length of wire, Lepage glue, nail polish, a small flat paintbrush, and flower foam. Add glue and nail polish to the circular parts of the dragonfly. Because the circles are small you can fill them in.
Wrap a strip of wire around the dragonfly and then push it into the styrofoam.
Starting with the glue, grab a dollop of the glue, push the brush to the underside of the wire loop, and slowly pull the brush across. It will leave a bubble of glue. It may not work the first time but keep trying, just remember to do it slowly and it will eventually work for you.
Let the glue dry for about half an hour.

Once the glue is dry add a dollop of nail polish to the glue spots and let dry.

You can use whatever nail polish colors you have on hand. The nail polish is great because the brush is tiny and the polish blobs together making the circle look jewel like.
How to Fold a Wire Ma[kin Ring
Although the thinner wire is very pliable and easy to bend for the dragonfly it’s a bit too light for the napkin ring. Instead of purchasing heavier gauge wire, I chose to braid the wire together first.
Cut three pieces of wire 20″ long. Hold one end of the wires together with an alligator clip and then braid loosely.
Once you have the wire braided fold it over to form an arch about three inches from the end. Place the arch onto a spice jar and tape into place onto the side of the jar. Wrap the wire around the back of the jar. Push it through the first loop and wrap it around the back of the jar again.

Arrange the wires so they are firm and as straight as possible. Tape the ends in place to hold them securely. Trim the wires to about 1 1/2 inches.
Now we’re going to weave the ends of the wire into the braid on the other side.
On the loose side pull one wire out of the braid and push it into an open space on the other side. Pull it through using the needlenose pliers. Then push it through another hole in the weave. Repeat until woven in.
Repeat with the other two wires.
Remove the other piece of tape, and weave in the rest of the wires.
Once everything is weaved in. Pinch tightly with pliers.

Attach the DIY Wire Dragonfly to the Napkin Ring
My first idea was to start by wrapping the napkin ring wire around the dragonfly while I was putting the ring portion together. I nixed that idea because it looked too bulky. Instead, start with a six-inch piece of wire. Lay the dragonfly on top of the napkin ring.
Insert the wire into the weave near the tail of the dragonfly, and wrap the wire around the body of the dragonfly twice to secure it to the ring.
Insert the wire back into the wave and pull it out by the head of the dragonfly. Wrap the wire around the upper portion of the dragonfly’s body.
Finally, weave the wire ends into the napkin ring to secure it.

Once attached, tweak the placement of the wires, mine needed some straightening and I placed the central wires of the wings back in place, etc.
I am going to use these dragonfly napkin rings for a picnic basket kit that I received from an employer years ago. They aren’t breakable and are very inexpensive to make making them perfect for my little picnic basket.


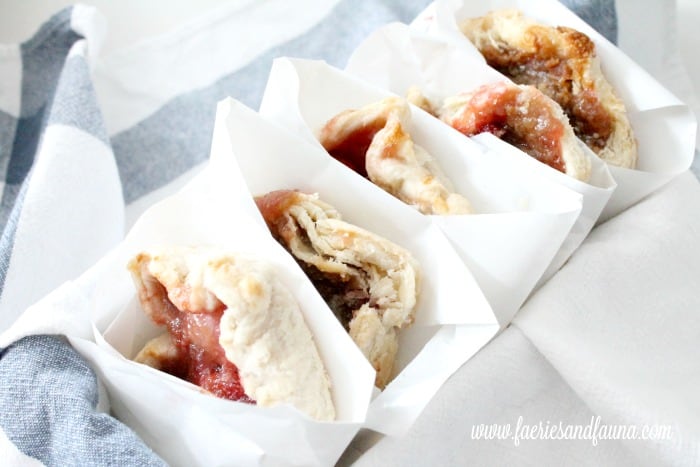
These individually wrapped strawberry rhubarb hand pies are a real hit for picnics as well. A little different and easy to serve in their parchment packages.
Beautifully done Leanna. Thanks for sharing that intricate tutorial with us, I never would have been able to do this on my own.
This is such a beautiful idea!! Perfect for a picnic for sure but also a fabulous idea for ALL special occasions! They would make such lovely gifts too! Love the nail polish technique!!
Thank you Sam. I think once Hubs is home I may try and do a video of this project. Adding the glue and nail polish is much easier than it sounds, and I hope a video will demonstrate that.
These are so cute Leanna! I love them.
Thank you for telling me Deborah. I have four of them tucked away in our picnic basket now. As they are cheap to make I think they will work nicely for picnics
Thank you for this beautiful DIY project. I love Dragonflies and now I will be able to make them.
Leanna, I assumed from the get-go that you wired jeweled beads onto the pretty dragonfly napkin rings. My jaw dropped when learning they were made with glue and nail polish – brilliant! Immediately my thoughts went to how lovely these would be wrapped around a set of linen napkins and given as a bridal shower gift! I’m going to share this on both my gift idea and wedding Pinterest boards for that reason. LOVE these 🙂
Thank you Marie. I don’t often think about weddings. I focused on picnicking instead because I cannot wait to finally be outside. These would be super cute for outdoor wedding venues for sure. Great idea.