DIY Wood Bunny for Spring Decor
Homemade Easter Wood Crafts using Scrap Wood
Homemade Easter wood crafts are as sure a sign of Spring as red robins. It’s such a wonderful time of year when we finally get to shirk off the Winter doldrums and go outside again. It’s still too cold to be relaxing outside, but puttering around creating some homemade wood Easter bunnies is a really good way to start being outdoors. At least a little bit.
It is so fun to make homemade Easter wood crafts, and bunnies are always my favorite Easter decorations. Besides the lovely bunnies, there are numerous other homemade wood Easter craft projects we can try right now using wood scraps. Small wood craft ideas like signs made from wooden blocks, wooden carrots, and wooden Easter eggs. All these great ways to spend some time in the garage outdoors, door open letting the fresh air in, and subduing what’s left of Winter winds.
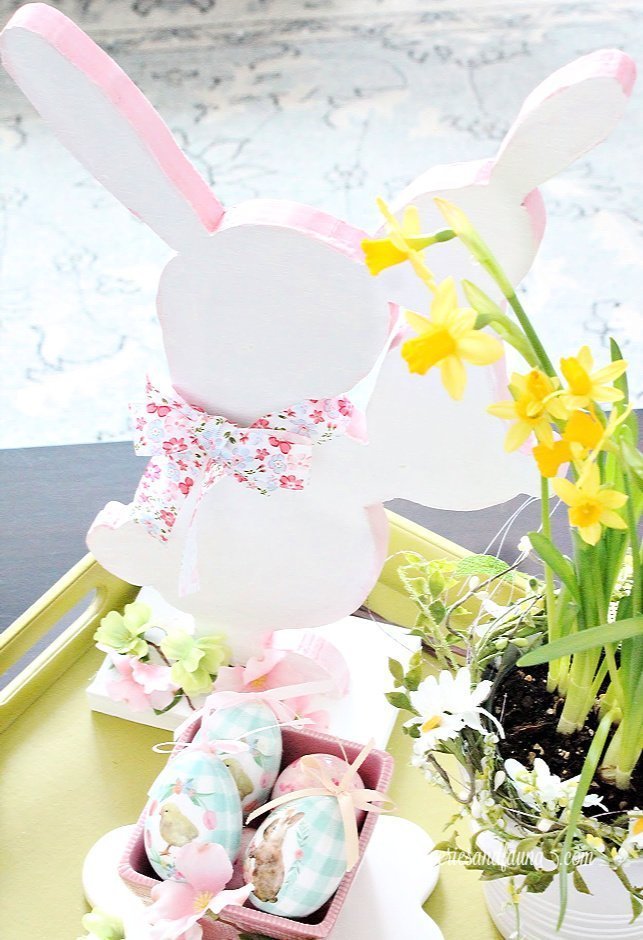
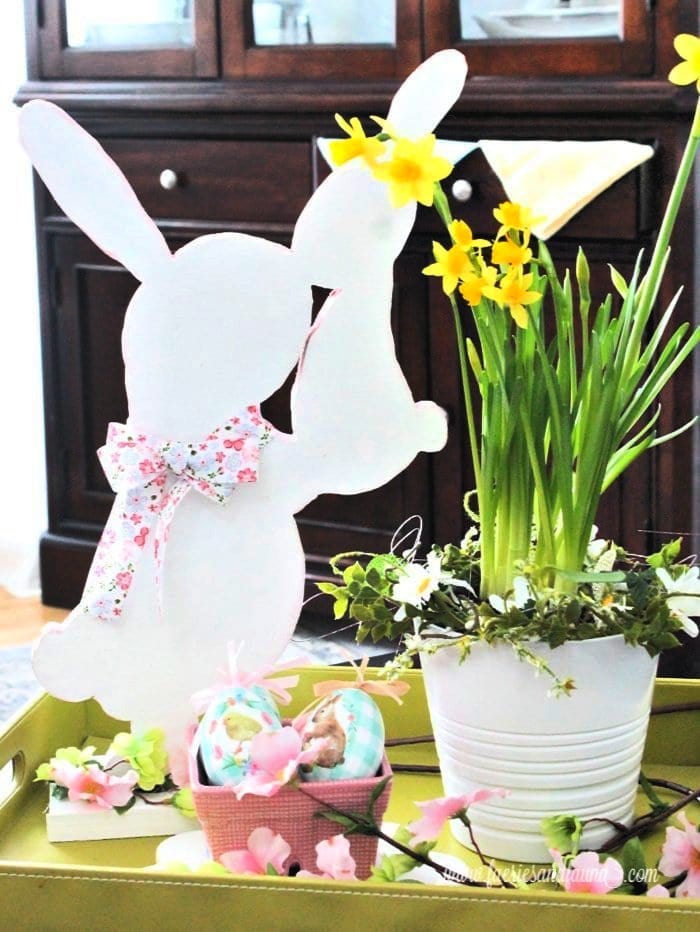
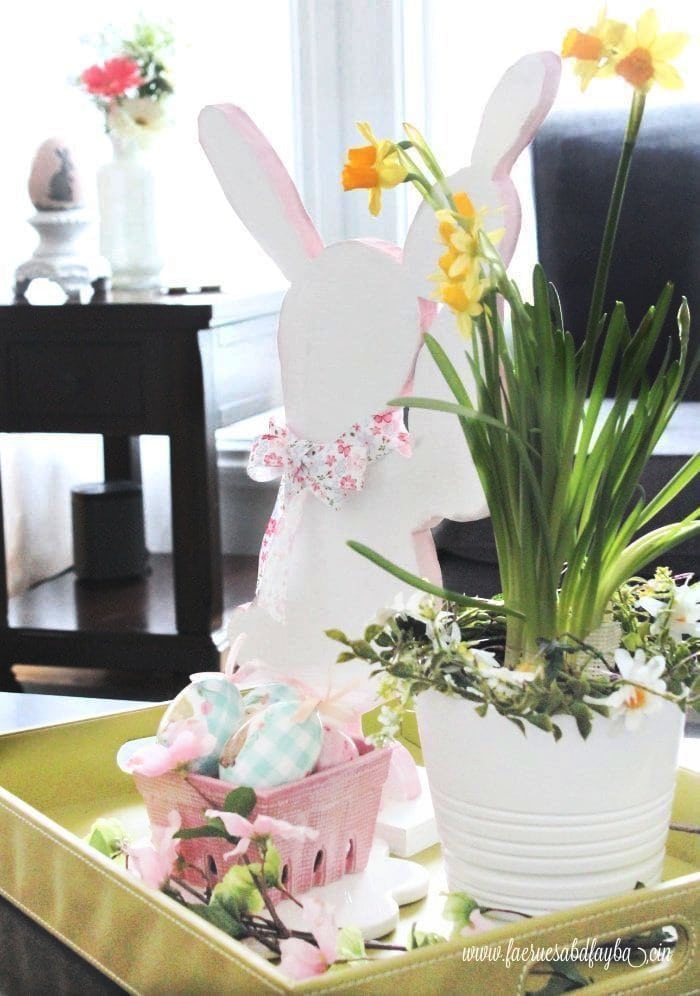
This particular wooden Easter bunny craft celebrates Spring. To me, it looks like a Mother bunny who is happy to be playing with her little bunny and having so much fun. I imagine them playing outside on a warm Spring day, joyous to be outdoors again, and this girl can relate.
This wooden bunny is very inexpensive to make and with the base, it stands about 19 inches tall. It is made out of 3/4 inch plywood that I had leftover from making snowmen, so mine is already painted white. If you don’t have any leftover plywood you can purchase 1/4 sheets at Lowes or Home Depot. For this easy project, besides the scrap plywood you will need:
- White paint
- Pink or blue craft paint
- small paint brush
- Wood Bunny Shape Cutout Pattern
- Jigsaw or Scroll Saw power tools
- 120 grit sandpaper
- Wood Glue, Hot glue
- 2 screws
- Ribbon and flowers
Print out the bunny cut out templates, there are three pages. Line them up using the lines of the rabbit to guide you and then tape together.
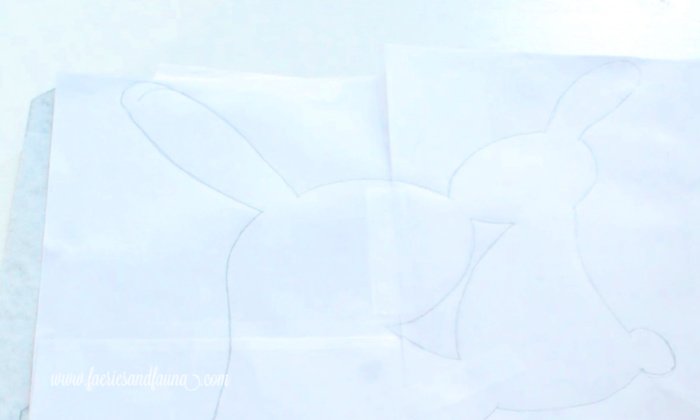
Place the plywood’s good side up and then carbon paper and the template.
Trace the pattern onto the plywood. As you work along check to make sure the pattern is transferring from time to time.
Once done remove the carbon paper and pattern.
Trace the pattern onto the plywood. As you work along check to make sure the pattern is transferring from time to time.
Place the plywood’s good side up and then carbon paper and the template.
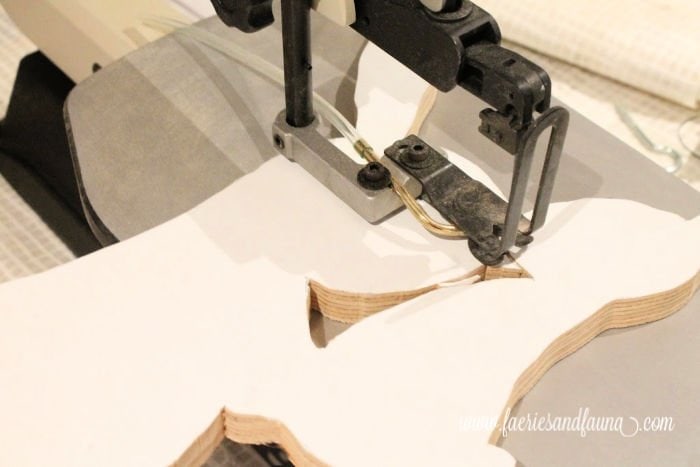
Cut out the wooden bunnies with either a scroll saw or a jigsaw, being especially careful around the bunny ears. For the hole between the two bunnies, I suggest drilling it in a couple of places to make room to start the blade.
Cut a rectangular base 5″ by 8″
Once the wood bunny is cut out, sand the rough edges smooth.
Paint the front, if the wood bunnies are painted white you will need two coats, maybe three.
Cut a rectangular base 5″ by 8″
Once the wood bunny is cut out, sand the rough edges smooth.
Paint the front and if the wood bunnies are in white you will need two coats, maybe three coats.
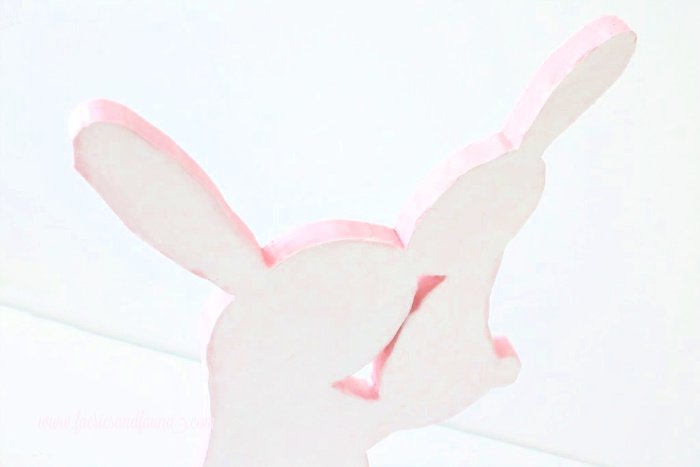
Paint the outside edge of the wood bunny DIY project with pink for girl bunnies, or blue for boy wood bunnies. Place a tiny bit of pink (blue) paint along the very edge of the front of the bunny.
Let dry very well.
Apply wood glue to the bottom feet of the bunny and attach. Screw in the base to the bottom of the bunny.
There are numerous ways you can update this Easter craft idea to make it all your own. Add different pastel colors to the ribbons. Use hot glue and doll cloth skirts for the mom bunny. If you’re more talented than I am you can use paint markers to add a simple bunny face along with the length of ribbon.

Adding Ribbon to the Painted Wood Bunny
I chose to make my bunny a girl so I added pink acrylic paint to the edges and made the ribbon pink and floral. If you want to make it a boy bunny, paint the wood edges blue, and give him a bow tie of ribbon.
I thought I would show you how I made the ribbon. If you can tie a simple ribbon go for it. I wanted to use this particular pastel colored length of ribbon and it isn’t wired. To create the ribbon first loosely wrap the ribbon around the large bunny’s neck. I then made two small loops of ribbon sewing each of them in the middle with a needle and then I hand stitched the two loops together.
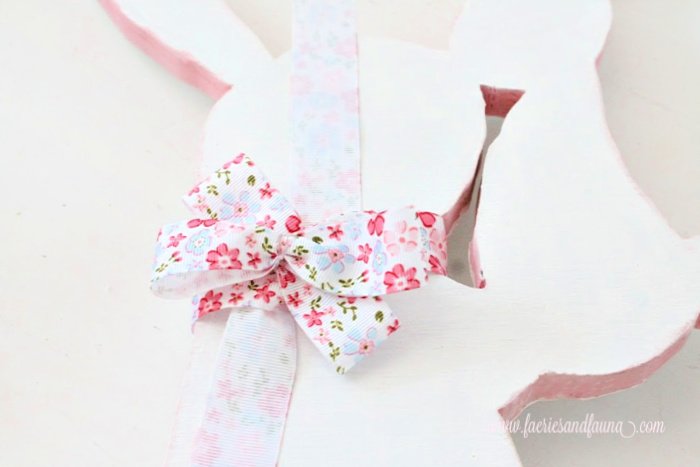
Once the two ribbon loops were sewn together I laid it on top of the neck ribbon and tied it into place. Doing it this way left me with enough control to pinch the ribbon together with thread and hold everything in place so I could control it better. This worked well for the unwired ribbon.
Where to Use the Wood Bunny Easter Craft
This wooden Easter bunny is quite tall making it a great backdrop for various Easter decor ideas. In an egg basket, you can use it as a part of a festive sideboard display along with assorted wooden eggs. Today I have it sitting on our coffee table in the family room on a tray, but she could certainly sit on the front foyer table. If you wanted to make it even larger than the one here I think it would be fun out on the front porch, it just depends on how much scrap wood you have available. Wherever you choose to use yours I hope you had a great time making her.


Home Sense Bunny
A couple of weeks ago I was shopping and came across this brown bunny. I just want to let you know I created mine First. Did they take my design… I guess kind of… I like the colors, but I think the mouths look funny.

Other DIY Easter Crafts to Try
Making bunny crafts is an enjoyable way to think about all things Spring while we wait for warmer days. I love creating bunnies, so the blog has all kinds of them to check out. Here are three more spring DIY ideas for home decor you can enjoy making.
Think warm thoughts Leanna.

Wood Bunny Easter Craft
This pair of his and her wooden bunnies are made using scrap wood and a free downloadable pattern. They are smaller than the kissing bunnies in today’s post. These little bunnies feature wire ears you can pose any way you like.
You can paint the faces using a free template included in the post,
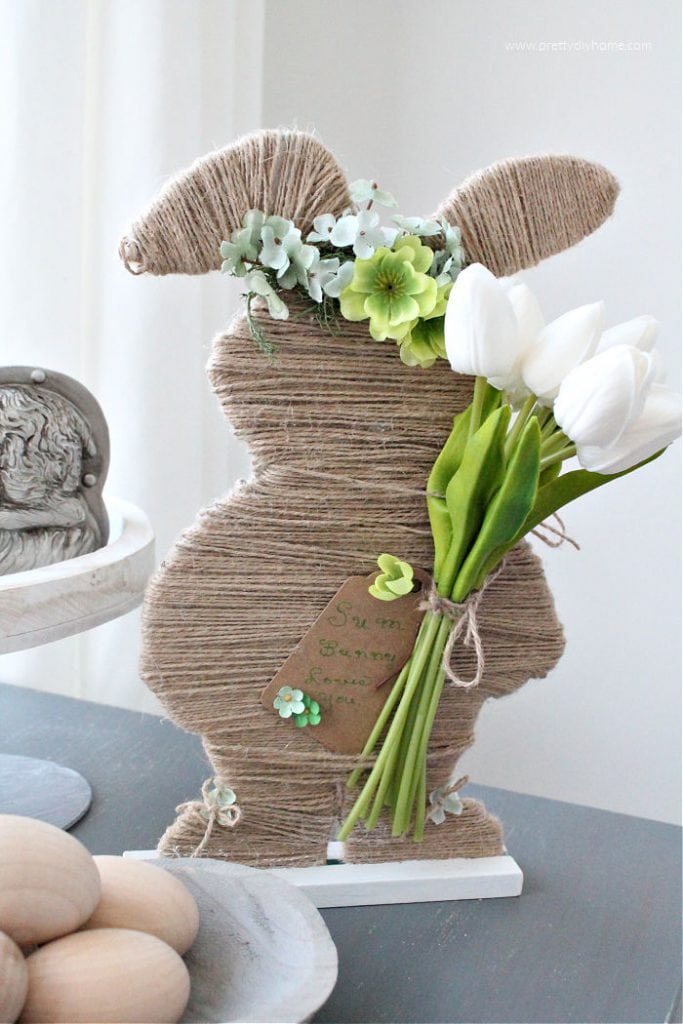
Dollar Store Bunny Craft
Would you believe this neutral burlap twine-wrapped bunny was once a sparkling blue bunny? This dollar store DIY bunny Easter craft project is easy to do, just wrap and tie twine around the basic shape, then you can decorate it in different ways to make it yours.

Burlap Bunny Art
This burlap DIY bunny Easter craft is a bit different. Create this small burlap bunny using burlap, and embroidery thread, and place it on a wood backdrop for adorable Easter or Spring Art.
Awwwwwwwwww, I can feel the happy love from the mommy bunny. So cute Leanna. Your Grandbabies must totally feel loved with all the specialness you have going. on. And it’s such a lovely way to celebrate the joy and promise of Easter
Thank you Michelle. I haven’t seen my girls for a while, harsh Winter roads have a habit of doing that, but Spring is showing signs of arriving. Yeah.
Awh, this is just adorable. So much cuteness! I love the idea of making a decoration like this that will last and last.
I think this is so cute! 🙂 What a great DIY for Easter/Spring! 🙂 I am pinning it!
The little bunny is so sweet. What a nice way to showcase Easter and beyond.
Thank you Debra. She is going to be a staple around here, unless I decide to gift her to my little ones.