Dollar Tree Wood Sign DIY for Spring
Are you getting excited about Spring’s arrival? We are still boot deep in snow here, but the calendar says Spring, so I am enjoying making fresh seasonal decor like this little Spring sign.
I am always super excited to start Spring decorating, beginning with bunnies and flowers, then adding Easter eggs as the season unfolds. Wanting something a little different this year, I invested in beautiful lamb clipart and created a Spring printable that can be crafted into decor using an inexpensive Dollar Tree style wooden frame.
This Dollar Tree Wood Sign DIY is quick, budget friendly, and adds a soft seasonal touch to shelves, mantels, or entry tables.

How to Make a Dollar Tree Wood Sign with a Printable
Supplies
Canvas paper gives printable artwork a soft, textured finish that feels more like real art than regular printer paper. I purchased mine at Michaels in Canada, and the wooden frame came from Dollarama.
- Canvas Paper
- Lamb Spring Printable
- Small dollar store wooden frame (smaller than letter size)
- Mod Podge and a small paint brush
- Stain or paint (optional)
- Ribbon and embellishments (optional)
Step 1: Prepare the Wooden Frame
Depending on your decor style, you may want to stain the frame or paint it white. I considered painting mine sage green, but in the end I left the wood natural for a softer, rustic look.
Step 2: Print the Spring Artwork
The lamb printable prints full letter size, so if you are short on time, you can simply print it and display it in a frame, on a clipboard, or taped to a cutting board.
If you want to turn it into a framed wood sign, here are a few helpful printing tips.
Printing Tips
Run a quick test page to confirm which side of the paper your printer prints on.
In your printer settings, choose color, best quality, and the correct paper type. Higher quality settings create richer detail and more texture in the artwork.
You may notice a thin white border around the image. This is normal and helps protect your printer. Since the printable will be trimmed, it is best to leave the border in place.
Using Canvas Paper for a Painted Look
To avoid a paper like finish, I printed on canvas paper. The sheets are slightly larger than letter size, so I trimmed them down before printing using a paper cutter and a standard sheet of paper as a guide.

Step 3: Size and Trim the Printable
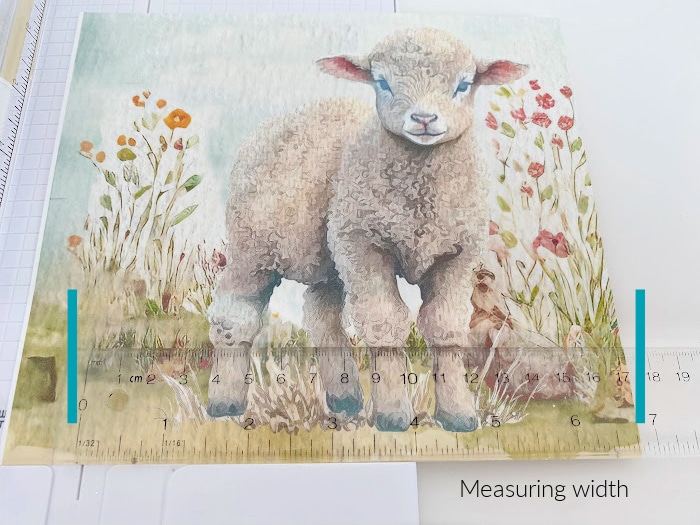
Measure the inside of your frame carefully with a ruler, since accuracy matters for a proper fit. My frame opening is 6 3/4 inches in both directions. Before cutting, estimate where the printable should be trimmed so the design fits well and stays centered inside the frame.
The printable includes extra space at the top and bottom so you can trim without cutting off the lamb or floral details.
Starting at the bottom, hold a ruler or a straight piece of paper where you want the lower edge of the frame to sit. Measure 6 3/4 inches upward and check how the artwork looks within that space. Adjust slightly if needed so the lamb and florals feel balanced.

For the width, trim off the white printer border first, then measure and preview how much of the image will show inside the frame.
Cut slowly and as accurately as possible. If you are unsure, it is better to leave the print slightly larger and trim small amounts until it fits neatly. Test fit the artwork in the frame and make fine adjustments until it sits cleanly and comfortably.

Step 4: Attach the Printable to the Frame
If you have read my tutorials before, you may know Mod Podge is not usually my favorite craft supply, but it works well for securing the artwork smoothly in this project.
Remove the printable from the frame. Apply a thin, even coat of Mod Podge to the back panel of the wooden frame, paying extra attention to the corners. Place the printable into position, starting from the center and pressing outward to smooth it down.
Once it is attached, apply a second thin coat of Mod Podge over the surface to seal and protect the artwork. Allow it to dry fully before moving on.
Step 5: Add Final Embellishments
You can leave your Dollar Tree wood sign simple, or add subtle decorative details to embellish it.
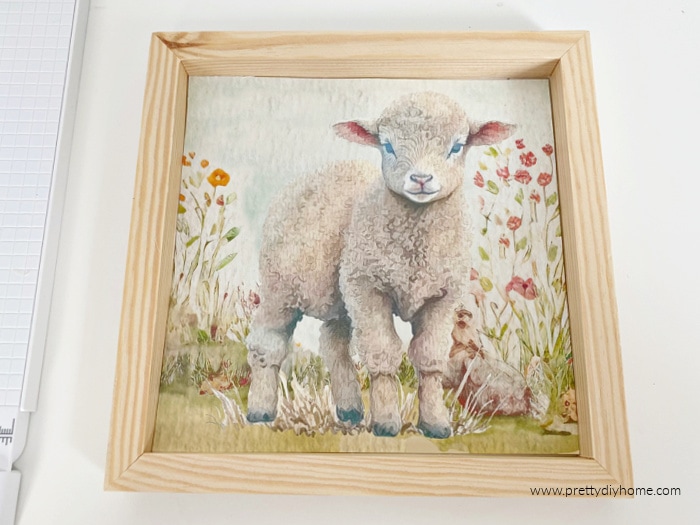
For my Spring sign, I tied a small ribbon in the corner and added natural wood beads. I originally planned to hang the sign, but instead draped the bead strand over the top like a small farmhouse garland.
Pin It for Later
Save this Dollar Tree Wood Sign DIY so you can come back to it when you are ready to decorate for Spring. It is a simple project that makes a lovely seasonal accent or a thoughtful handmade gift.

This Dollar Tree Wood Sign DIY is fun to make and pretty when displayed. It is a simple way to bring a soft touch of Spring into your home, even while the weather outside is still slow to warm.
More Dollar Tree Spring Craft Ideas

Easy DIY Spring Wreath with Dollar Tree Supplies
This Easter bunny wreath features an adorable Dollar Tree wooden Easter bunny, decorated with floral wall decor stickers and pretty florals, all available at Dollar Tree.

DIY Teacup Candles with Dollar Tree Supplies
Vintage teacups make beautiful candles. These are made using Dollar Tree glass enclosed candles, and you can customize them with any essential oils you like.
This is so cute and I can’t get over how easy it was to make too, Leanna! I don’t know how you stay so creative but I’ve loved everything you’ve shared this season. It’s all fantastic. Big hugs, CoCo
What an adorable sign!! That lamb is so cute!!
Thank you Rachel. I love little signs, and shelf sitters but they can be so pricey to collect. I appreciate you taking the time to comment.
Your printable is adorable, I love it in the frame, it’s perfect for Spring! We are headed into another storm tonight no snow just rain, but I’m also am ready for some sunshine!
Arghh eh. This is truly the hardest time of year for me. I get Spring fever so bad, thank goodness for pretty Spring decor blogs.