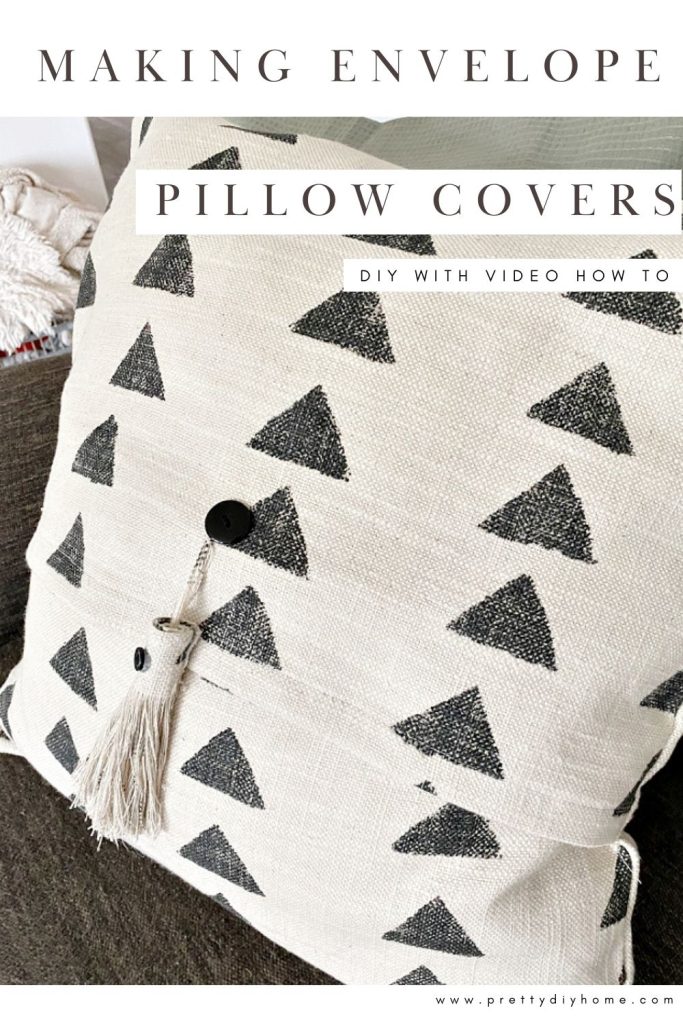
Envelope Pillow Cover Tutorial
Making Envelope Pillow Covers with Fun Tassles
This easy step-by-step tutorial for an envelope pillow cover can be used to make any pillow cover size you need. My pillow covers are made for a 20 by 20-inch cushion, as I much prefer the larger size couch pillows. If you already have a cushion in a different size you want to use, no worries, it is very easy to tweak the pillow cover tutorial for other sizes.
My couch was in desperate need of some modern pillow covers, we went to the USA for the holidays and I grabbed some gorgeous black and white fabric. The fabric is thick with lots of gorgeous texture making it perfect for the living room.

An envelope pillow cover is a pillow case that has an overlapping side to insert the pillow into it very easily without the pillow insert showing. They are an easy way to make a cushion cover because you don’t need a zipper, there is no pattern to transfer, and all the sewing seams are straight edge seams, no curves, folds, etc. You will sometimes see envelope cushions made with glue, which is fine if you only want to use them for one season. I am sewing these envelope cushions to make them washable.
Supplies for Making Envelope Pillow Covers
When at the fabric store you have a few decisions to make that will affect the quality of your cushion project and how easy it will be to make. An envelope cushion method works for pretty much any fabric, even velvets, denim, or outdoor waterproof fabric. This method works for outdoor cushion covers, but make sure to purchase an outdoor fabric. For indoor cushion covers, I recommend cotton fabric because it reduces static. Static is a deal breaker for me, so I never sew with polyester. As always it’s your choice.
If this is your first time sewing a cushion cover I suggest using a plain fabric without a pattern, or a small pattern you can sew without matching. Matching patterns along the seam is fiddly and if you’re new to sewing it’s one less thing to think about.
One yard of fabric (depending on fabric width) for each cushion.
Matching thread (I like Gutermann brand thread the best)
Fabric scissors, measuring tape, seam ripper.
Iron
Optional supplies – Rotary cutter, clear acrylic ruler, and a self-healing rotary mat. (This method is easier for cutting straight lines.) If you don’t have them use fabric scissors and a measuring tape.
Making an Envelope Pillow Cover Tutorial
Step 1 – Wash, dry, and iron your fabric.
Step 2 – Decide what you want your cushion dimensions to be. Cut three pieces of fabric. I used scissors to cut my fabric this time, but a rotary cutter on a hard surface works very well, especially on thinner fabrics. The size of your fabric pieces will depend on the dimensions of your pillow form.
Cut ONE large square fabric piece whatever size you want your pillow to be plus 1/2″ on all sides for seam allowance. For example:
- 20-inch cushion – cut your fabric 21″ square.
- 18-inch cushion – cut your fabric 19″ square.
Cut TWO rectangular fabric pieces the same width as your square fabric, and 3/4 times as high. For example:
- 20-inch size cushion – cut two pieces 21″ wide and 16″ high
- 18-inch size cushion – cut two pieces 19″ wide and 14″ high
Step 3 – Hem two rectangle pieces.
The opening of the envelope needs to be hemmed on each piece of fabric before placing your cushion together. When sewn the two pieces will meet where the hems are. So make sure the pattern of your fabric is going the way you want it to before pressing and hemming your fabric. Once you have the pattern the way you want it it’s time to start sewing.
With the good side of the fabric facing down, fold each rectangular piece 1/2 inch. Press to make a crease.
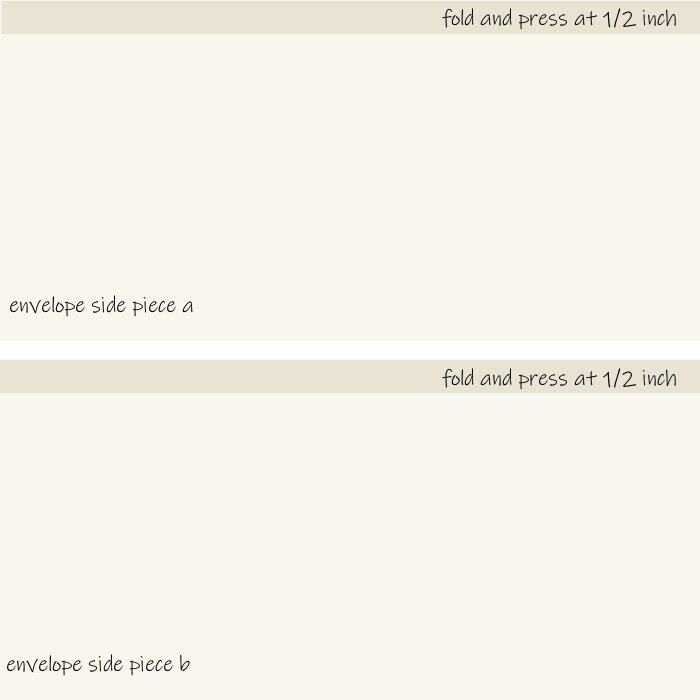
This is how it looks. Repeat for both pieces.

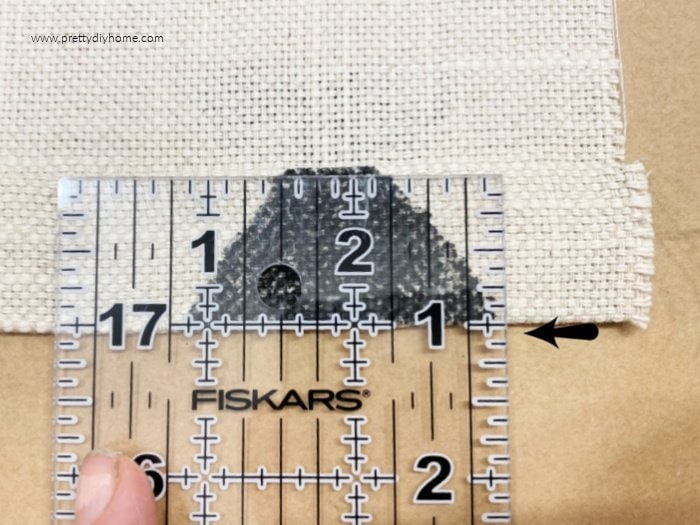
Refold the edge over at one inch. (this seals in the raw edges into the hem) Do for both pieces.
.
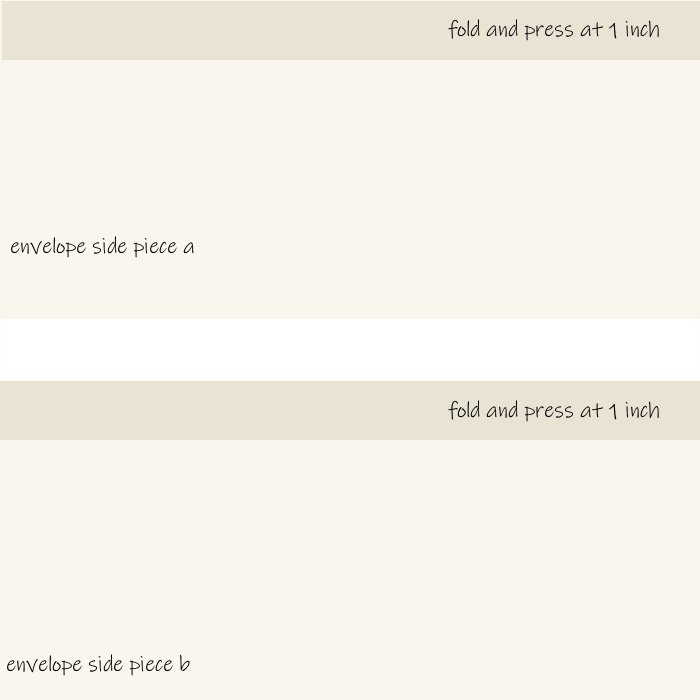
This is how the folded edge looks. Finish for both pieces.
Once folded and pressed sew a narrow seam along the folded side edge of the layers of fabric, this finishes the two hems for the envelope closure.

Begin by sewing a few stitches at the start of your seam. After you have a few stitches sewn, back over the stitches to secure them. Continue sewing to the end of the seam, and back over stitch again to secure the far end.
Step 4 – Finish all the Outside Hems
The next step I take is to sew a stitch along the raw edges of the fabric before sewing the cushion. I find it super annoying to sew while little bits of threads unravel from the cut edges of the fabric. To mitigate this I suggest finishing all your seams now instead of later. It’s simple and quick to do. Sew a narrow zigzag stitch along all the cut edges of your fabric. Do this so the zig-zag goes on both sides of the fabric’s edge. Other tutorials will suggest you sew the cushion cover first, trim seams to remove extra fabric, clip the corners, and then seal the edges. Do it whichever way you like.
Step 5 – Pinning the Envelope Cushion Together
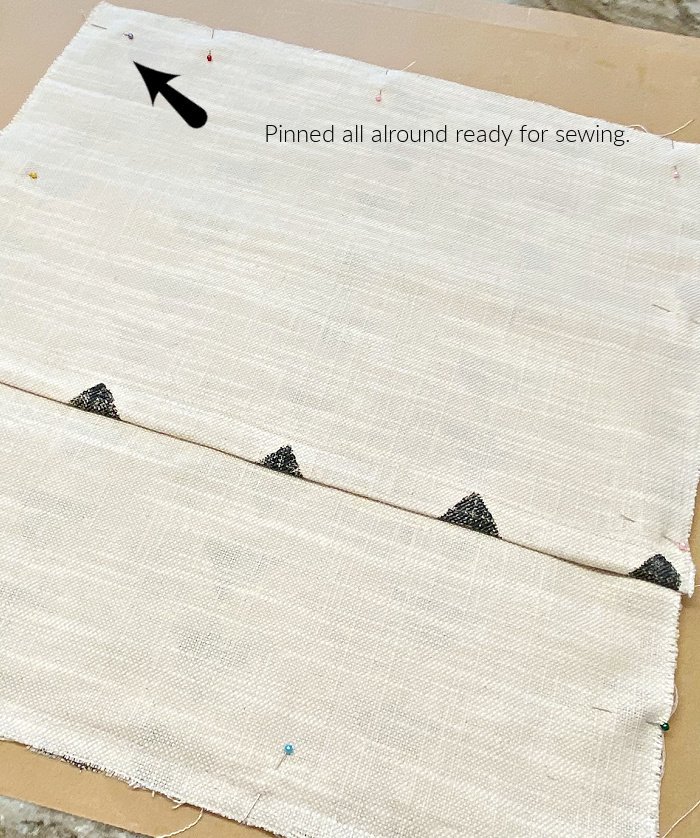
You want the right sides of your fabric to face each other. Begin by placing the large square piece of fabric good side up. Cover with the two rectangular back pieces with the wrong side down with the hems towards the center. The two rectangular pieces will overlap.
Pin everything into place.
Step 6 – Sew the Cushion Cover
Sew all the way around the pillow cover 1/2 ” from the edge of the fabric. Your sewing machine will have little marks alongside the needle showing the measurements to run your fabric against. Use a back stitch at the beginning and the end to prevent unraveling.
Step 7 – Turn the Envelope Cushion Right Side Out
Turn your gorgeous new cushion cover right side out, and insert your cushion.
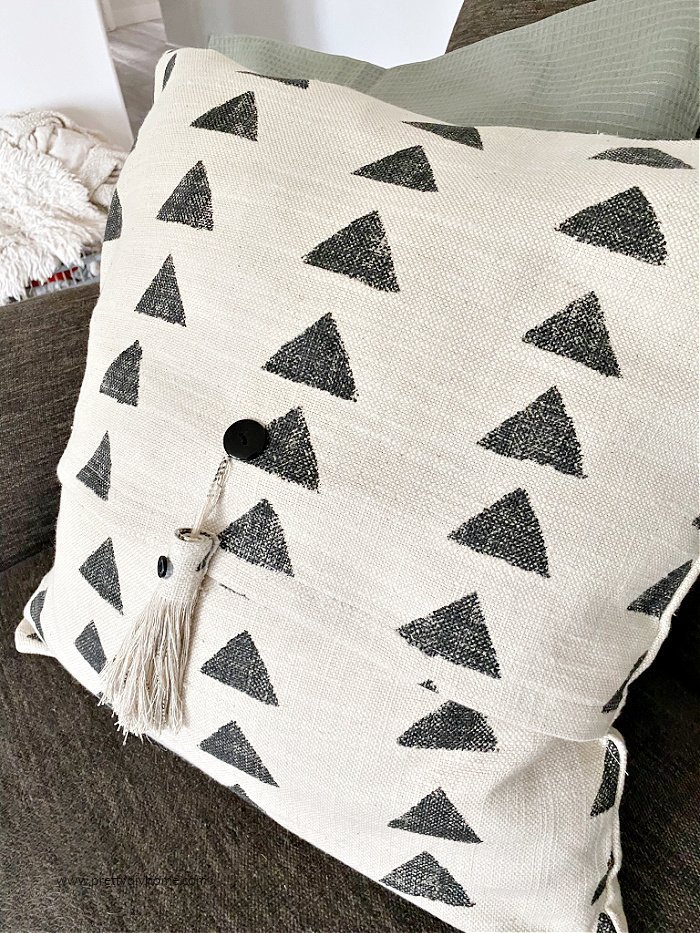
Now decide how you want to orientate your envelope cushion cover. If you want to add a tassel like I did, place the opening towards the front of the cushion. If you don’t want a tassel and prefer a clean fronted cushion cover, place the opening towards the back.
Video Tutorial for Making Envelope Pillow Covers
If you want to see the steps in a video.
Adding a Tassle
After finishing the cushions I decided to add a tassle to my new cushion covers. To attach the tassle I flipped the envelope cushion around so what would usually be the back of the cushion with the opening became the front of the cushion. Then I attached the tassel where the overlap is. The finished cushions look nice both ways, but I really love the look of the finished cushions with the simple to do tassels.
image
I will post the step-by-step tutorial for the tassel separately as soon as it’s written.
Enjoy your new cushions they are such an easy way to refresh a room’s decor room and enjoy an hour or two crafting.
Happy Sewing,
Leanna
I will post the step-by-step tutorial for the tassel separately as soon as it’s written.

Other Pillow Tutorials to Try
Pillow covers are not only easy to make I think they are really fun to create. The variety of cushion covers you can make is endless. Here are a few of the other pillow cover tutorials I have written.
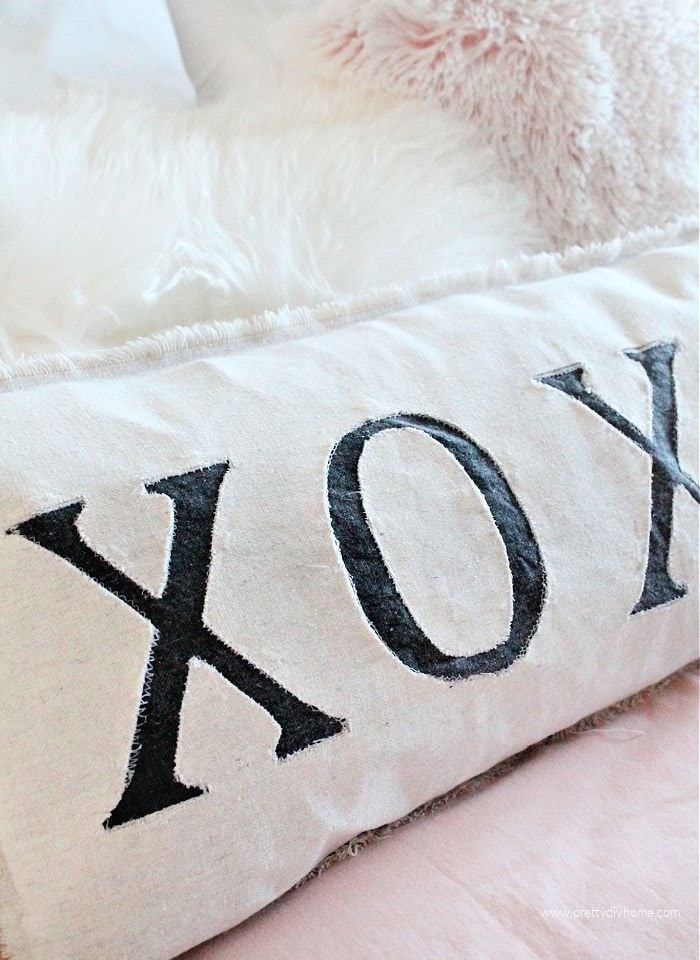
Farmhouse DIY Pillow Cover
This DIY Farmhouse Pillow Cover is made using drop cloth, and an unfinished edge. It’s fun for the bedroom or Valentine’s Day

DIY Bench Cushion with Zipper
Here is a tutorial for sewing a bench cover seat with a zipper and step-by-step instructions.
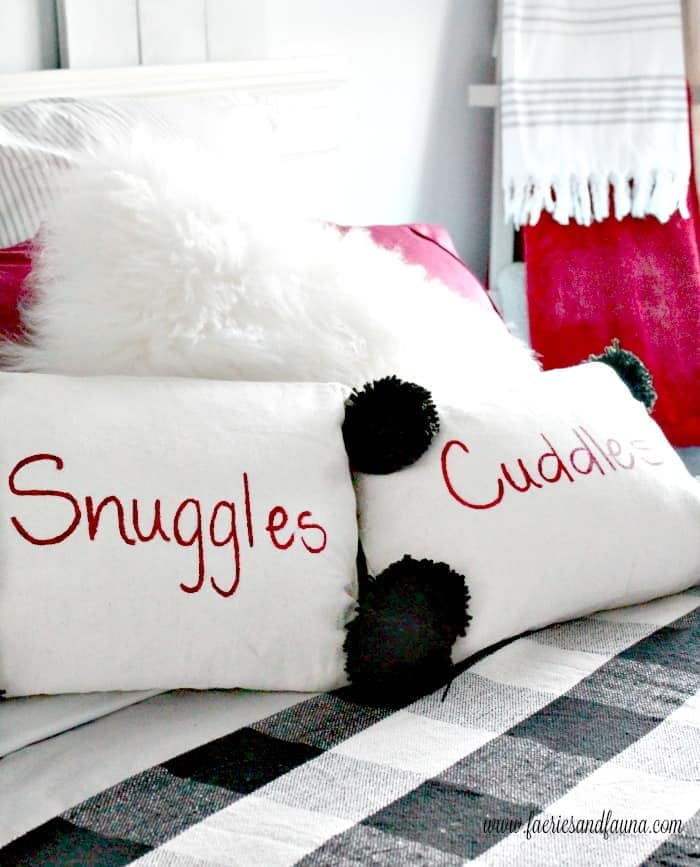
DIY Pillow Covers with Pom Poms
These snuggles and cuddles cushion covers are perfect for Christmas with red lettering, and fun for a teen’s bedroom any time of year.