DIY Dog Ramp for Stairs (Indoor or Outdoor)
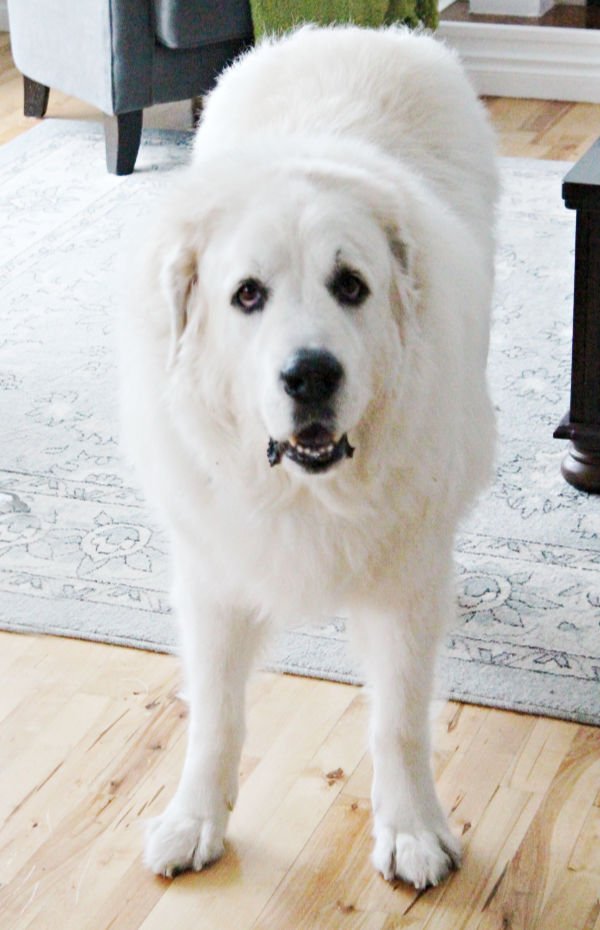
Our lovable Great Pyrenees is getting older, and like most large breeds, he is starting to slow down a little. We first noticed he couldn’t leap into the truck anymore, then he slipped on the hardwood floors, and recently he struggled with the two steps up to our patio. It was time to find a better solution for him.
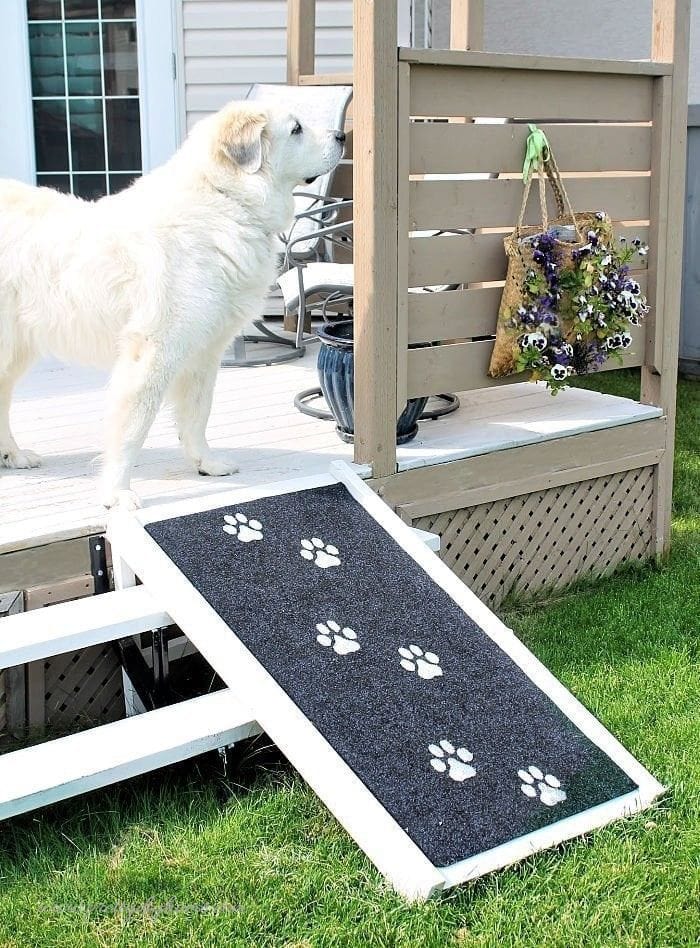
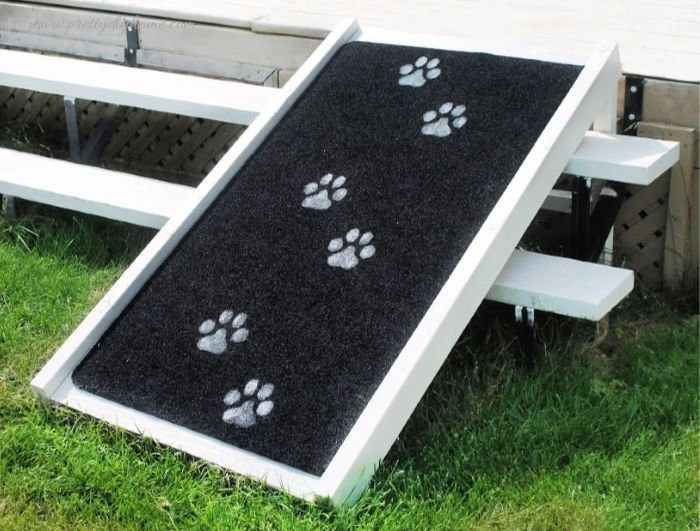
This DIY dog ramp for stairs is designed to sit over your existing steps, so you don’t need to cut into or rebuild anything. It also works well as a simple pet ramp for indoor or outdoor use. We built ours for outdoor patio stairs, but the same idea works just as well indoors for a couch, bed, or smaller staircase.
It’s a simple, practical project that can make a big difference for older dogs, large breeds, or any dog that needs a little extra help getting up and down safely.
Measuring Your DIY Dog Ramp
The best place to start is by looking at your own stairs. Every space is a little different, so taking a few quick measurements first will help you decide what size ramp will work best.
The Ramp Size
Start by deciding how long you want your ramp to be. The longer the ramp, the gentler the incline will be for your dog to walk up.
Ours is about 4 feet long, which gave our dog a manageable slope without taking up too much space. The ramp is 2 feet wide, which worked well for our large dog and fit nicely between the existing stair supports.
An easy way to visualize this is to take a scrap board outside and hold it along your stairs to get a feel for the angle before committing to your final size.
The Upright Supports
The upright legs of the ramp need to fit into the space available under your existing stairs. Take a look at the area between the stair tread and the stair frame to see how much room you have to work with.
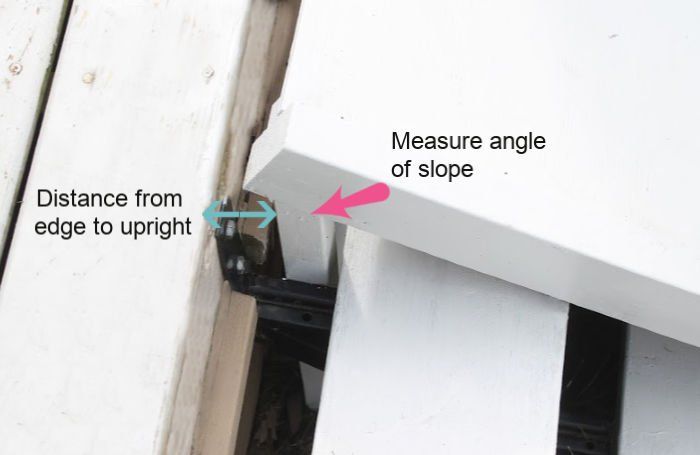
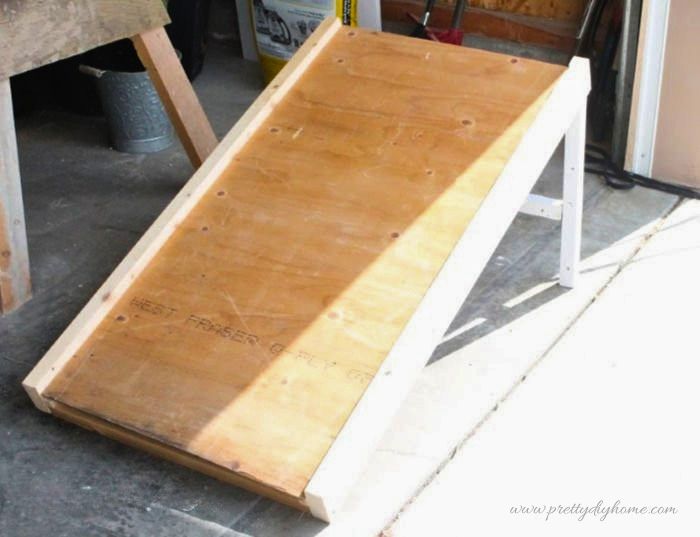
Next, you need to decide how long the ramp supports need to be. Check out the picture above to see what I am referring to. The completed ramp does a better job of illustrating it, but this is how we figured it out.
We took two lengths of 1 by 2 scrap lumber outside. Make sure the underside of the stairs is free of grass and debris. Place one 1 by 2 into the open space under the stairs, and lay the second board along the stairs where the ramp will sit.
Hubs held it in place while I marked with a pencil where the height of the upright needed to be, following the angle of the ramp itself. So you’re aware, the actual incline is about 25 degrees, but it was much easier to just mark it this way.
Distance from Edge to Upright
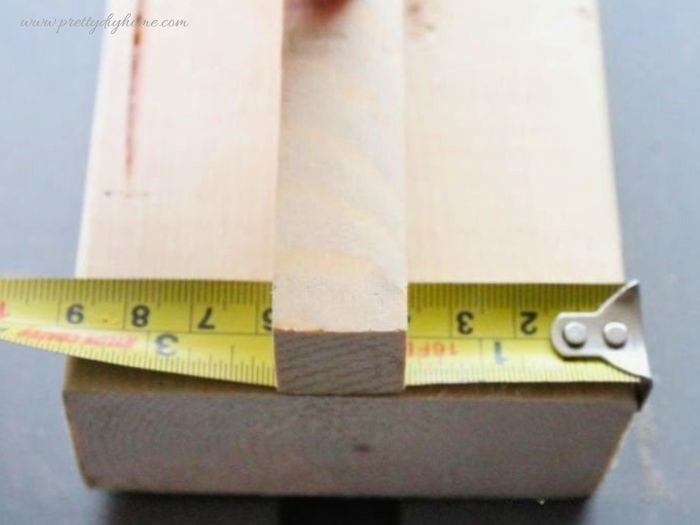
Finally, check how far in from the end of your ramp the upright support needs to sit.
Ours was placed about 1.5 inches in from the edge. I wrote it down so we knew where to position the leg when cutting and assembling.
You can see in the photo that the grass had started growing up under the stairs, so it’s a good idea to clear that out before you begin. It just makes it easier to measure and work underneath.
Using This Dog Ramp Indoors
Although we built this ramp for outdoor stairs, the same design works just as well indoors. You can easily adjust the height and length to fit a couch, bed, or smaller set of stairs.
Used indoors, this ramp can help protect your floors and make it easier for older dogs or smaller pets to move around safely.
Building the DIY Dog Ramp
Once you have your measurements figured out, you’re ready to start building the ramp. Don’t worry about making everything perfect right away; you can double check your fit as you go.
Supply List
You will need the following materials to build your dog ramp. The exact sizes can vary depending on your measurements, but this is what we used for ours.
- 1/2 inch (or thicker) plywood, approximately 2 feet by 4 feet
- One 2 by 4 for the main frame
- Two 1 by 2 boards for supports
- One 1 by 1 board for the side edges
- 2 by 2 pieces for cross braces and legs
- Wood screws (3 inch)
- Finishing nails (about 1.5 inch)
- Wood glue
- Paint
- Carpet or rug for traction
Tools
- Drill or screwdriver
- Hammer or air nailer
- Saw (mitre saw or skill saw)
Optional for Decorating
- Dog paw print stencil
- Cardstock
- Polyurethane spray
Cutting the Lumber
We cut our lumber to the following lengths based on our stair measurements.
- Cut 2 – 2 by 4 boards, 4 feet long for the ramp
- Cut 2 – 1 by 1 boards, 4 feet long for the ramp
- Cut 1/2 inch (or thicker) plywood, 24 inches by 48 inches, for the ramp surface
- Cut 4 – 2 by 2 boards, 2 feet long, for cross braces
- Cut 2 – 2 by 2 boards, about 18 inches long for the upright legs, angling one end
For the legs, the angle works out to about 25 degrees if you’re using a mitre saw. Or you can use the easier method and just cut along the pencil mark you made earlier.

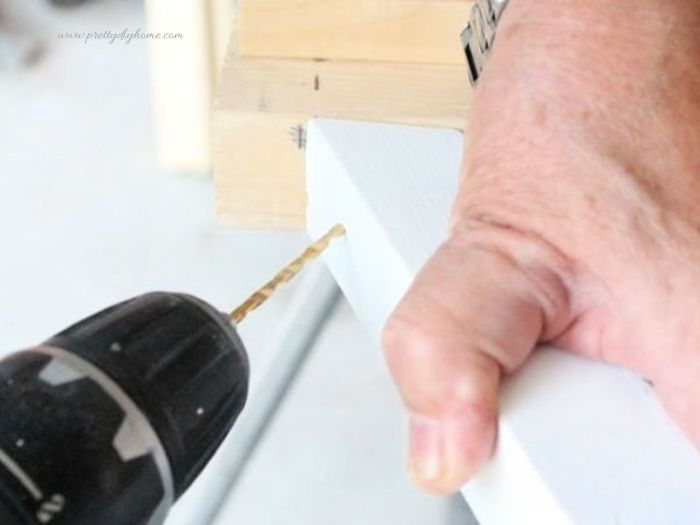
Adding the Ramp Side Edges
To create a small edge along the sides of the ramp, attach the 1 by 1 boards to the inside of the 2-by-4 frame pieces.
Measure about 1.5 inches down from the top of each 2 by 4 at both ends. Line up the 1-by-1 board with those marks and secure it in place using 1.5-inch nails.
Line up the 1 by 1 to the marks and nail in place with 1 1/2″ nails.
Repeat the same steps for the other side.
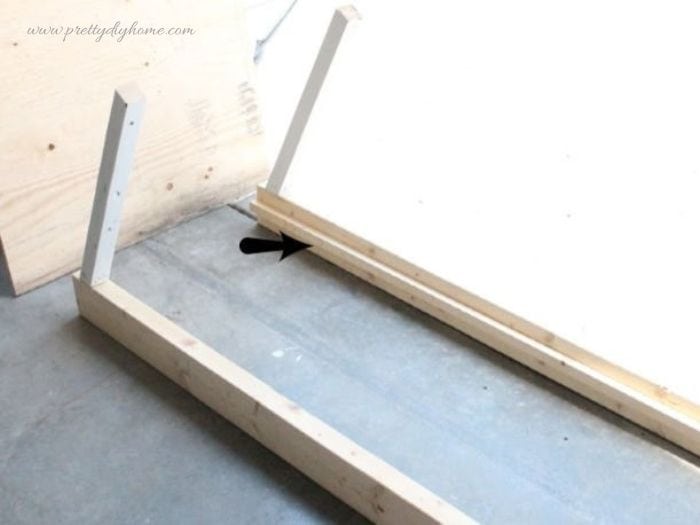
Attaching the Uprights
You’ll need to refer back to your stairs to determine the correct placement for the upright legs.
For our ramp, we positioned the legs about 1.5 inches in from the end before attaching them, with the angled end sitting against the 2 by 4.
Hubs added wood glue to the end first, then secured the legs using 3-inch screws. He angled the screws slightly so they wouldn’t come out through the wood.
This step can look a little strange at first, so we dry-fitted the pieces together before drilling and screwing everything in place.
Before attaching the second leg, lay the two 2-by-4 boards side by side with the ledges facing each other. This makes sure the 1-by-1 ledges are both positioned on the inside of the ramp.
Building the Dog Ramp Frame
For extra strength, add cross pieces to the frame. You might not need them for a small dog, but I recommend including them anyway. You never know when someone might decide to “test” the ramp.
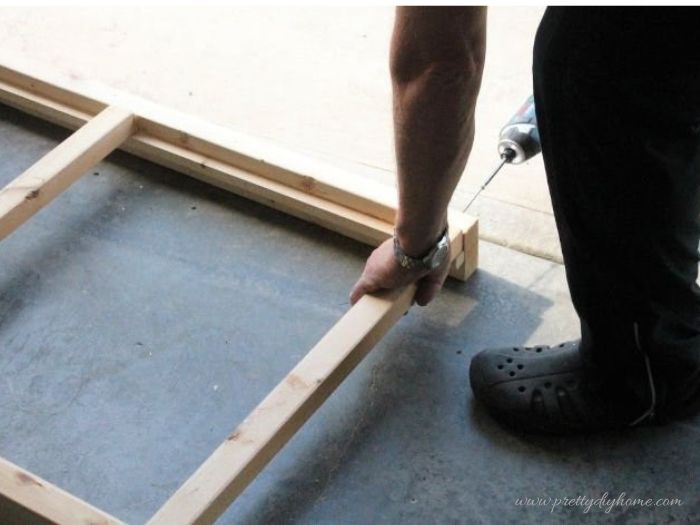
Hubs added a brace behind the legs, one along the bottom, and one in the middle of the ramp to keep everything sturdy.
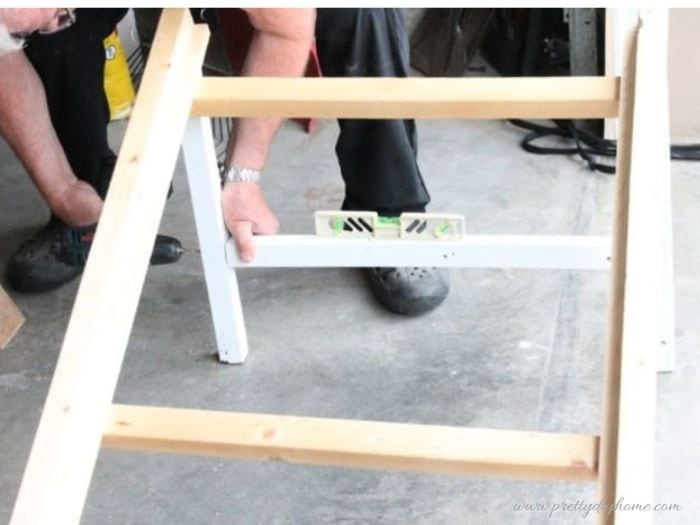
He installed the final brace between the two upright legs, using a level to make sure everything was even. If you don’t have a level, you can measure both ends before attaching it.
Each hole was predrilled before securing the braces with 3-inch screws.
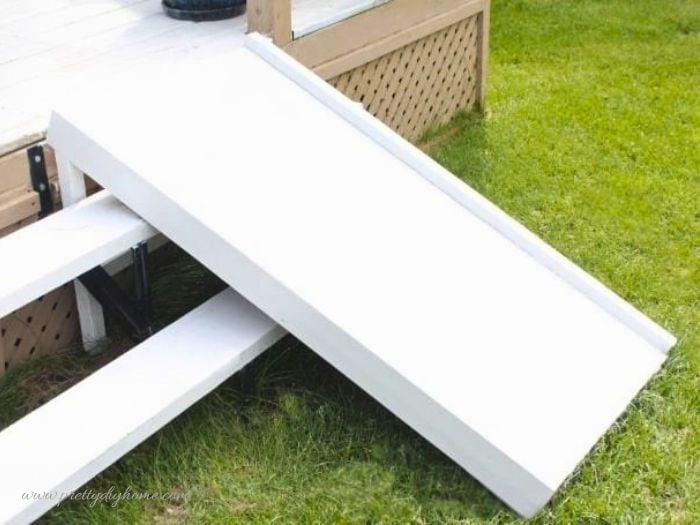
Attaching the Plywood Top
Lay the plywood on top of the frame, making sure all the edges are lined up evenly.
Once it’s in place, secure it using nails or an air nailer. We used small nails to attach ours, spacing them out along the edges and across the supports underneath.
Finishing the Dog Ramp
To finish the dog ramp, I gave it two coats of leftover paint we had from another project. It’s a great way to use up extra paint and helps protect the wood at the same time.
Once the paint was dry, we added a piece of inexpensive carpet to the top of the ramp to give our dog better traction. This step makes a big difference, especially for older dogs.
To dress it up a little, I made a simple dog paw stencil using cardstock and painted the design onto the carpet.
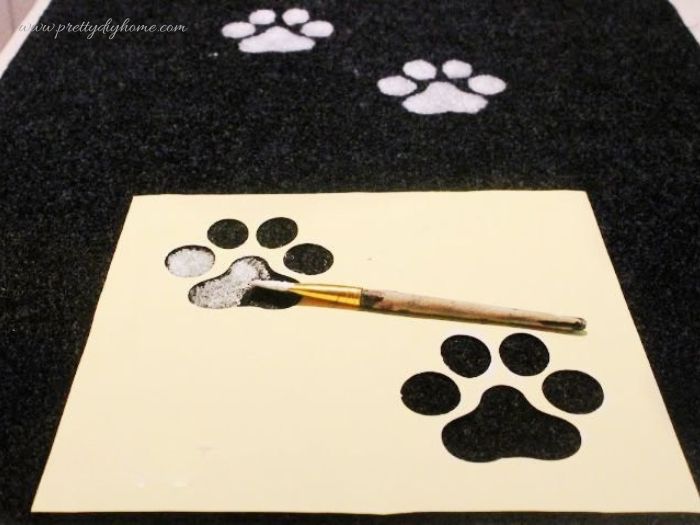
If you want the design to last longer, you can spray it with a clear finish, but that step is completely optional.
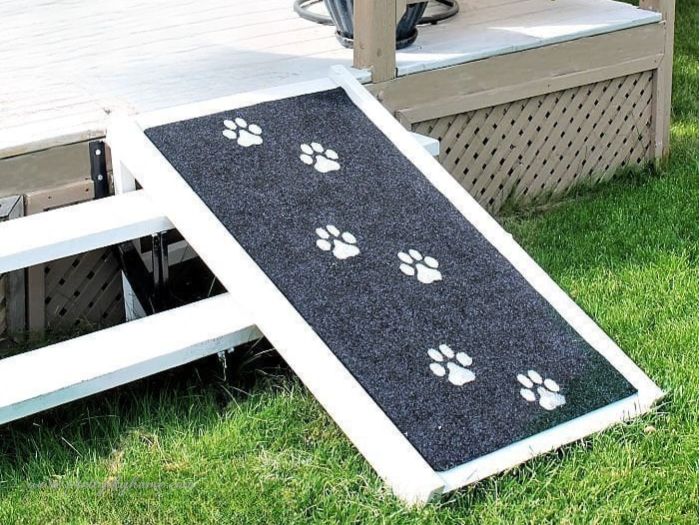
Dog Ramps are Easier on Dogs
Dog ramps with a non-slip surface are much easier for dogs to use, especially as they get older. They reduce the strain of jumping and help prevent slips on stairs.
Our big, lovable boy is full of energy, but he would sometimes catch a paw between the stair openings or slip when going up. This ramp has made it much safer and easier for him to get in and out.
Training Your Dog to Use the Ramp
All that’s left to do is train your dog to use the ramp.
It’s not shown in the picture, but I have a large movable fence or pen that I plan to place along the top stair so our pup doesn’t have another way down. That, along with a handful of treats, should help encourage him to give it a try.
Wish me luck… my big boy has a mind of his own.

Other DIY Pet Posts to Check Out
We love finding simple ways to make life easier for our dog while protecting our home at the same time. These are a few other DIY pet projects you might find helpful.

DIY Couch Cover for Dogs
This DIY couch cover is made using drop cloth canvas. We originally made it to protect the couch from a new puppy, but it also helped brighten up a darker room. It’s an easy way to protect your furniture without giving up comfort.
Removing Dog Hair from Carpet Stairs
If you have a dog that sheds, you know how hard it can be to keep up with it. Our vacuum just wasn’t cutting it, but this simple method works surprisingly well for removing dog hair from carpeted stairs..
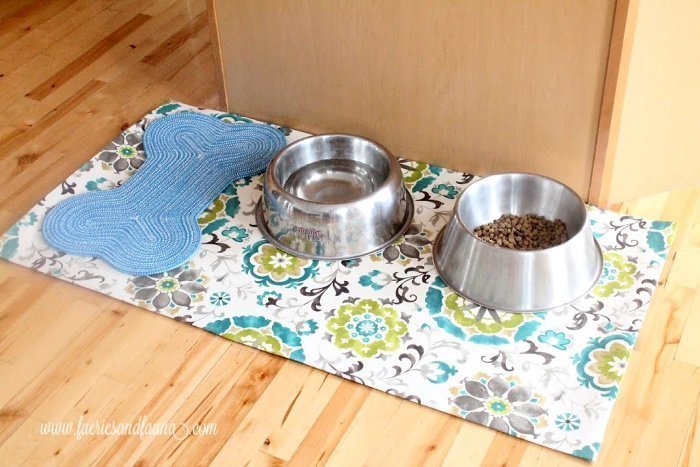
DIY Waterproof Pet Feeding Mat
Make a large waterproof pet placemat in any size you need to help protect your floors from spills and messes. It’s a quick project that makes cleanup much easier.
Amazing it looks. Thankyou for sharing it. Will try something similar with my partner for our puppy too 🙂
My daughter and I made this not for a dog but for our rabbit to get into her hutch after we elevated it so she could have a screened in bottom floor.
This is the coolest thing ever Leanna! I want to get a dog just so I can have one of these, lol. Your talent and creativity never ceases to amaze me. 🙂
This is such a neat idea! I would have loved this when our Matilda was still with us. She always struggled to get up the steps as she got older.
This is adorable Leanna! Makes me wish I had a pet 🙂
That is an amazing idea! And it turned out so well.
This is so cute and I am sure your puppy is so happy to have his own ramp.
This is such a great idea, Leanna! Both my children have large dogs and both with mobility issues so I’m definitely sharing this idea with them. I’m sure once your fur baby realizes how much easier it is to get off the deck, he’ll be using it all the time. Pinned 🙂
I’m sure your beautiful fur baby will start using his ramp in no time at all Leanna. It’s always so sad when they get older and you watch how they struggle to do all those things they used to do with ease. Love the fact that you care so much to make his life easier <3
Looks amazing Leanna! I miss my dog so much and she totally would have loved this. Thank you so much for sharing!