
Halloween DIY Decoration: Dog in Ghost Costume
How to Make a Ghost Dog Halloween Decoration
When it comes to DIY Halloween decorations, I prefer kid-friendly ideas that are sort of spooky instead of outright scary. Last year we were moving, so I took out a large blowup pumpkin we have had for eons, but this year it’s time for something fun, fab-boo-lous and boo-yah fun for a DIY Halloween decoration outdoors.
One of the coolest Halloween trends I have seen is dogs in ghost costumes. They are all so cute. I wanted to do that, but what if you have a very large dog like our Great Pyrenees who would NOT be agreeable to a full-size Halloween costume? Or what if you don’t have a furred friend to dress up? For those of us with that problem, I made this DIY dog ghost decoration for the yard or front porch.
He’s more adorable when he’s hanging out among the leaves and pumpkins.
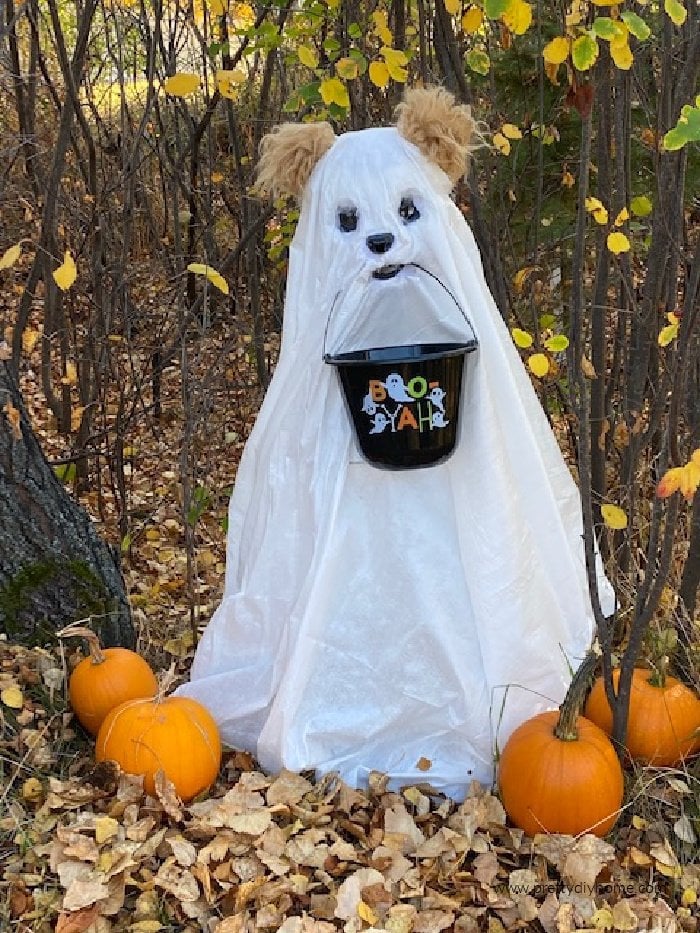
But I will be using him on my Halloween front porch with bats, branches and an owl to make him just a little more spooky.
DIY Ghost Dog Halloween Decoration Supplies
- Tomato Cage
- Dollar store Styrofoamhead
- Dog mask
- White lights (optional)
- Clear packaging tape
- Black and White Sharpie Pens
- Large plastic sheet
- Heavy gauge wire
- Candy bucket (removable handle)
- Hot glue gun, masking tape
Step 1: Prepare the Dog Mask
I began this project by making a cardboard dog mask, but then I found one at Walmart here in Canada. I dropped the DIY mask idea, which made this a really easy DIY Halloween decoration. By easy, I mean I had it finished in well under an hour.
The American Walmart website has dozens of really great dog masks in different breeds, which is so much fun because you could make a ghost that looks like your own pet. If you’re not able to purchase a dog mask, here is a great tutorial on how to create a paper mache dog mask.
Besides the dog mask, you’ll need a Styrofoam head. I found mine at the dollar store. If you can’t find one, a large piece of foam will work as long as it is big enough to support the mask.
Canada didn’t have those cute pumpkin shaped candy buckets, so I picked up this Boo-Yah one from the dollar store instead. Make sure the handle on your candy bucket can snap on and off so you can fit it through the ghost sheet.
Now let’s get started creating.
Step 2: Make the Ghost Dog Frame
Start with the tomato cage and lights. Place the male end of the cord, with the prongs, at the back of the tomato cage, then wrap the rest of the lights around the cage. Adding lights is optional.
I used some white Christmas lights we had on hand. When they’re turned on, the lights make the ghost glow and look a little spookier. You can skip the lights if the ghost dog will be displayed somewhere bright enough to be easily seen.
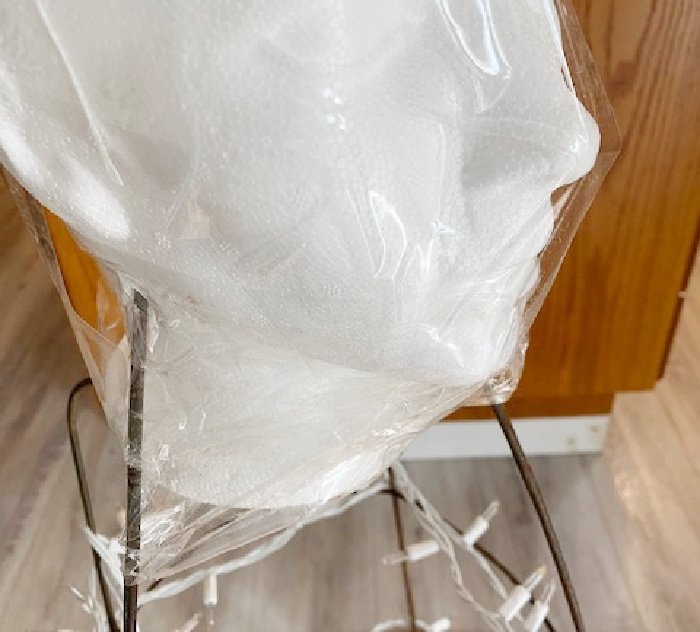
Once you have the lights wrapped around the tomato cage, push the ends of the tomato cage wires into the Styrofoam head as shown below. Nothing fancy, just make sure the head is sitting fairly straight.
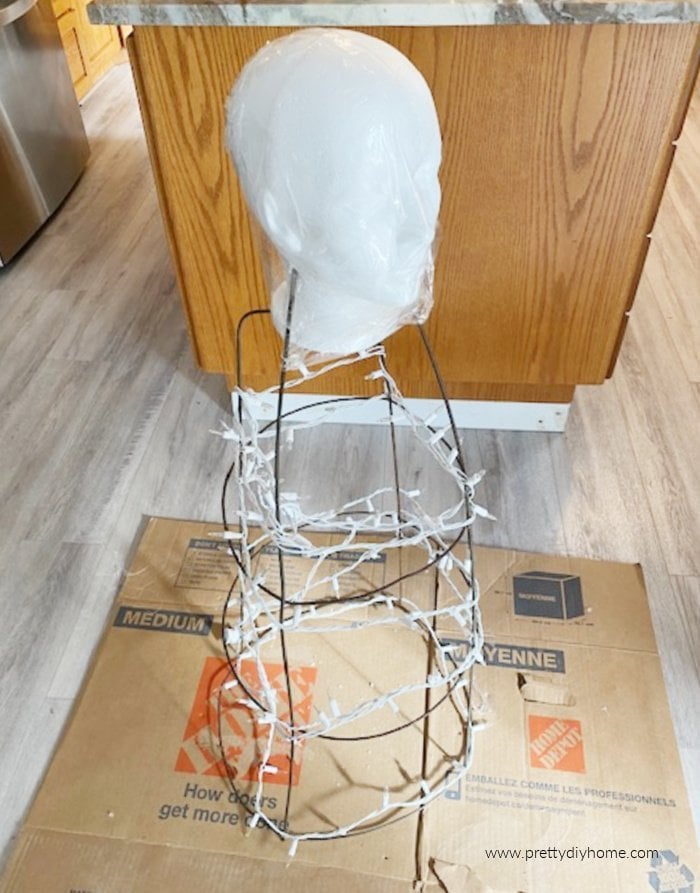
Once the tomato cage wires are stuck into the head, wrap everything very securely using clear packing tape.
Step 3: Customize the Dog Mask
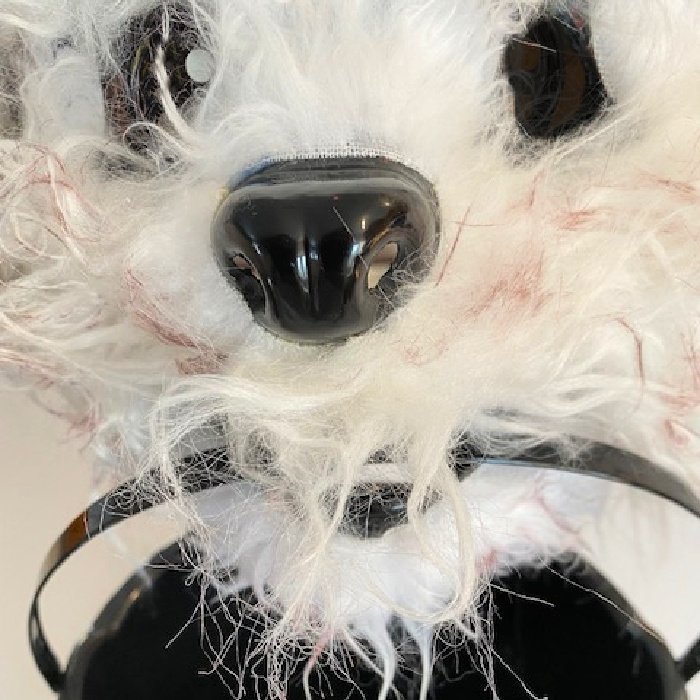
Our little dog mask came with scary eyes and a closed mouth with dirty yellow teeth. Using a black Sharpie, I coloured the eyes completely black.
Then I coloured two of the teeth white and the rest of the mouth black.
You need to make a hole in your mask for the wires and the candy bucket handle. Once the entire mouth was coloured black, I cut most of it out. The next photo looks pretty scary, but it shows me removing part of the dog mask’s mouth.
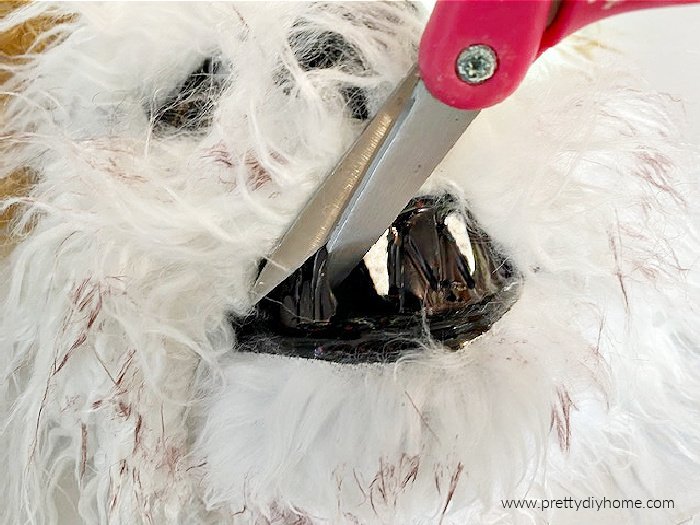
If you have to make a hole in the mask you purchased, leave some part of the mouth in place to camouflage the wire. Once the mouth is cut out, test it with the candy bucket handle to see how it looks.
Step 4: Attach the Halloween Candy Bucket
The process is pretty simple and quick because everything will be covered by the white sheet. The attachment needs to be strong, but it doesn’t need to look pretty.
To help the basket hang securely on the front of the DIY ghost, give it extra support with heavy gauge wire.
To figure out the placement, place the mask on the Styrofoam head and mark where the mouth will sit with a Sharpie.
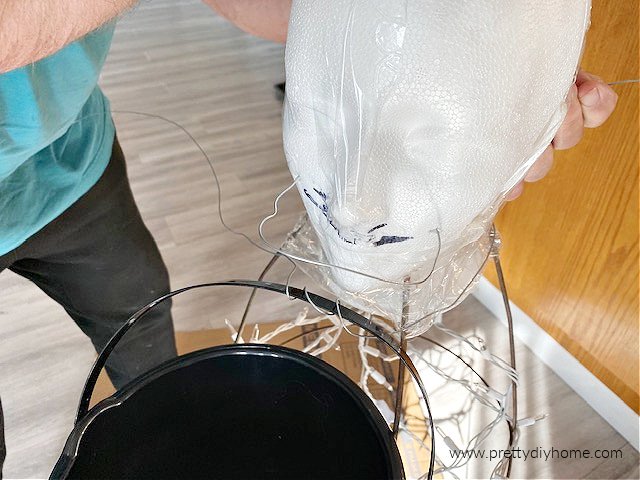
Cut three feet of heavy gauge wire that is sturdy enough to poke through the Styrofoam head.
Wrap the middle of the wire around the handle of your bucket. Make sure the bucket is centered before tightening the wire.
Hubs then poked the wire into the front of the head about an inch outside of the black pen marks. Push each wire right through the head until it comes out the back. Once both wires are through the Styrofoam head, twist them tight and then cover the wires with clear packaging tape.
Remove the candy bucket from its plastic handle and set it aside.
Step 5: Add the Dog Mask
To place the mask on the Styrofoam head, pinch the handle of the candy bucket together first and feed it through the mouth of the mask. Then place the mask on the Styrofoam head. Tape over the elastic on the back of the head to keep the mask in place. Put the bucket back on to confirm placement and adjust if needed.

Step 6: Add the Ghost Cover
Once you’ve confirmed placement, remove the bucket and cover the Halloween ghost dog with a plastic sheet. Make two holes in the sheet and fit the bucket handles through.
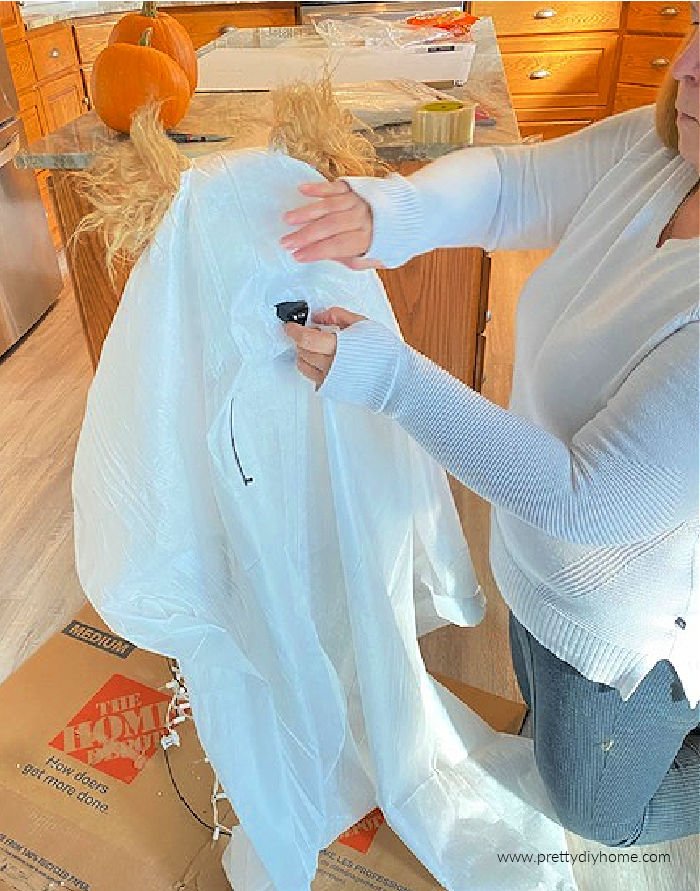
Cut out all the facial features, including the ears. Use your fingers to feel where each feature is, make small slices in the plastic, and enlarge the openings as needed.
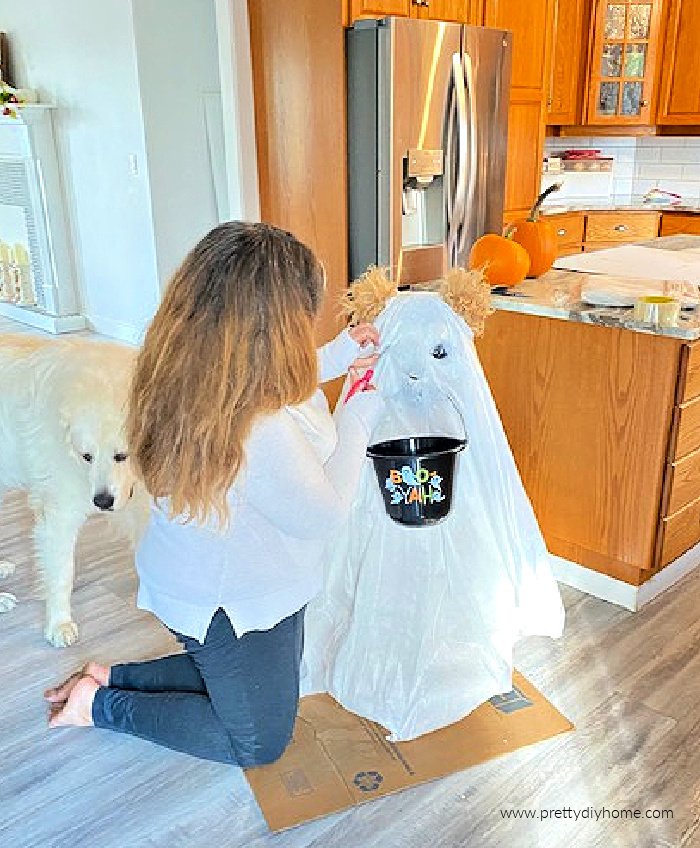
When I first dreamed up this idea, I was not certain it would work, whether the mask would look doglike enough, or how exactly I would put it all together. By now, I was starting to get really excited because it was developing into something I really liked. So far, we had spent about half an hour putting this little DIY Halloween ghost decoration for outside together.
We are still doing house renos and had just finished putting in a ceiling in one of the rooms downstairs. I could not have been happier with how quickly this came together for us and for you. The ghost decoration was pretty much done at this point. I just spent another ten minutes or so with a hot glue gun, folding the edges of the plastic sheet and gluing them into place.
This is what the dog features looked like before tidying.
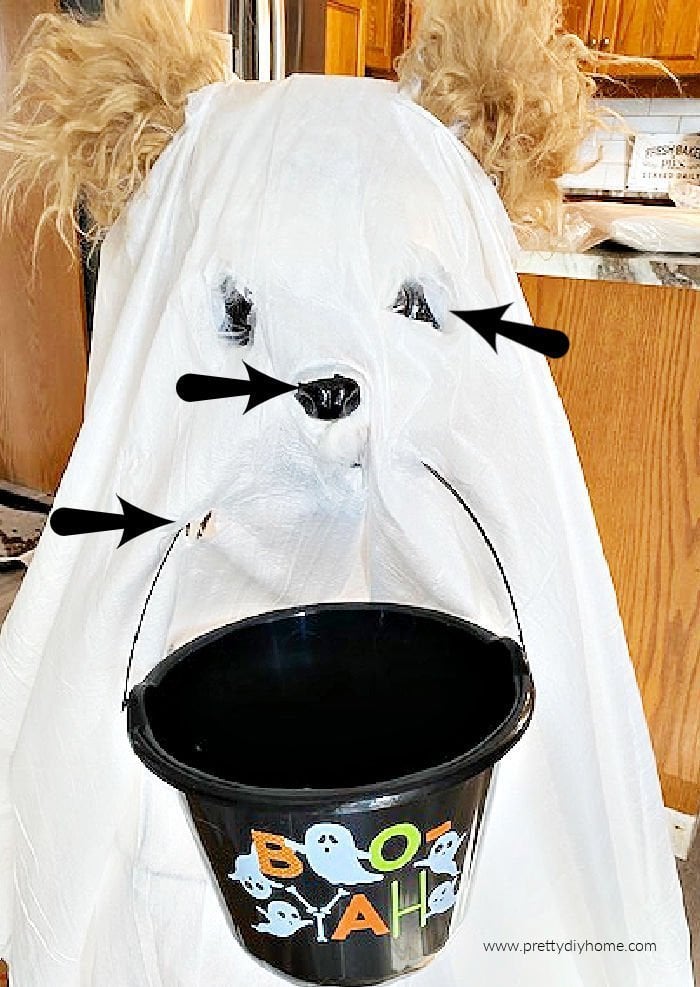
Step 7: Finish the Ghost Dog Decoration
All I did was fold each edge of the plastic and hot glue it in place. I snipped some of the fur where necessary, then opened the plastic around the mouth and folded it back as well.
As I said, we are busy with home renovations, so I turned on the video camera and we just pitter pattered away working on the ghost dog. I’m not sure how helpful you’ll find it because it’s very casual. The video begins where I placed the sheet over the ghost dog’s head.
I am super excited about how this DIY Halloween decoration for outdoors turned out. I couldn’t wait to share it with you. I hope you find it as boo-tiful as I do. For this post, I took some photos of the ghost out among the trees, but I’ll be using him on our Halloween front porch.

Want to see where this ghost dog ended up? Take a look at our finished Halloween front porch, where I used him with the rest of the outdoor Halloween decorations.
Love this DIY ghost dog Halloween decoration? Save it to your Halloween Pinterest board so you can find it when you’re ready to make one for your yard or front porch.

More DIY Halloween Decorations for Outside
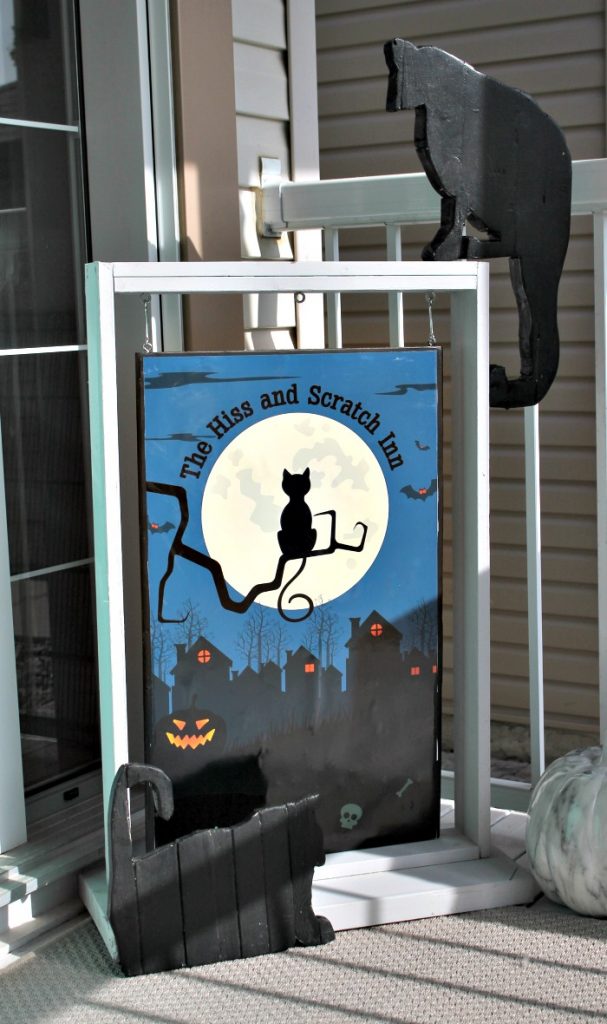
Hiss and Scratch Inn Sign
This Halloween decoration hangs from a DIY plant hanger I made that converts to a Halloween Sign of the Hiss and Scratch Inn. Of course, there are two black cats, Hiss & Scratch.
Sad Porch Ghosts
These little Halloween front porch ghosts begin as a tall flower pot and a soccer ball from a neighbour. They are super easy to make, especially with stick-on googly eyes.

2 Comments