How to Sew Christmas Chair Covers without a Pattern
DIY Christmas chair covers are a lifesaver for budget decorators, especially if you have an open-concept living space. Our kitchen chairs become the dining room chairs for the holidays. These DIY chair back covers cost less than $20 to make, and they added elegance to our eating area turning our plain kitchen set into an elegant Christmas dining room. I especially enjoyed the bright white to go with this year’s Christmas theme.
As my Christmas theme is bright white these chair covers are done in white home decor fabric, but of course, you can use any fabric you love. If you love the look of white, I suggest using it with a washable white fabric. Although white shows the dirt it is easy to clean with bleach and hot water.

h
Please take a minute and check out the next image. Imagine this same table set without the chair covers. Functional and solid and quite nice, but it’s certainly not elegant or festive. With the open space living area, I think it’s well worth the evening it took to sew all of these to update our dining chairs, You will spend more time on the first one, and the rest zip together very quickly. The tutorial is longer and more detailed than may be necessary but this is a great project for a beginner as all the seams are straight and no pattern is required.f

How to Sew DIY Chair Covers
Chair Cover Supplies
- White Fabric 2- 3 yards approximately the amount depends on your fabric width and chair size. I used Minna fabric from Ikea
- Sewing Machine, thread, scissors, straight pins.
- String or embroidery thread
- Christmas decoration for embellishment
Sizing the DIY Christmas Chair Covers
How much fabric you need will depend on the size of your chair, and how many covers you want to make. So let’s start by measuring the size of one of your chairs.
To help you visualize their is only ONE piece of fabric per chair. These simple chair covers fold over the back of the chair and are sewn down the sides. The top edge of your cushion back cover is a fold. You don’t have fabric pieces to fit together making these cute chair covers easy to make without a pattern.
If you want to be careful, you can start by cutting paper to double-check your measurements making sure it’s the right size before cutting any fabric. (I didn’t worry about )
Find Fabric Width
Width of chair + Chair thickness (x2 for each side) + 2″ for Seams
Our chairs and are 16 inches wide and 1.5 inches thick.
16″ for width + 1.5″ +1.5″ for the two edges, plus 2″ for seams. So my fabric is cut 21 inches wide.
Find Fabric Length
Likely you can cut your fabric to 35″ long. If you have really short back chairs, you may want to shorten the fabric. Use a measuring tape and measure from where you want the chair cover to start on the front of your chair, go over the top and measure to where you want the point to be on the back. Then add 1 inch for seams.
Cutting the Fabric
Prewash and iron your fabric.
Cut into a rectangle according to your calculations. Mine is 21″ wide and 35″ long.
Hemming the Fabric Edges
Let’s begin with a simple rolled seam on each narrow end (21″).
Place the fabric right side down. Fold the bottom edge of the material over 1/2″ and then 1″. Press well and sew along the edge. Turn your fabric around and repeat at the other end.

To seal the two long raw edges and prevent the fabric from fraying, sew a zig-zag stitch to finish both edges.
Sewing the Chair Covers Pointed Triangle Ende
Doing this part is much easier to sew than it is to explain. After finishing my chair covers, I added a video tutorial further down the blog post. If you get confused check it out.
We will begin by finding the center of our fabric. To do this fold your material in half lengthwise. Line the two edges up and make a small mark where the center is. (It will be about 10.5″), you can use a piece of chalk or a straight pin for this. This will be the point of your Christmas chair cover.
With one hand hold the center and with the other fold over the corner into the middle of the fabric forming a triangle. Repeat on the other side. Press well.

Once the triangle is folded add the string for the ornament.
Cut a piece of string about 4 inches long and tie a knot in the end. Place this thread with one inch past the point of your triangle and lie the remaining portion along one of your side seams.
f

g
Press very well and then sew a 5/8 inch seam allowance seam along the outer two sides of the triangle.

You will now have a triangle with the point at the bottom of your chair cover and the string at the point to allow you to hang the Christmas embellishment. Were close to done, but the central seam isn’t connected. The next picture illustrates what I mean.

In order to sew the central seam of the triangle closed and not show through the front of the chair fold it open.
Flip the chair cover over then line up the two central seams. Sew as narrow as possible seam. This will hold the triangle shape.

Turn your fabric right side out and place the rightside down. The seam will be on the inside of the triangle.

Sewing the Envelope Style Covers
With the fabric good side up, fold the second hemmed edge towards the triangle. Place the edge so that it meets the top corner of the triangle.

Sew both long seams along both sides forming the envelope. Stop when you reach the end of the folded-over fabric. Do not sew onto the triangle portion. Turn right side out, press and place on your chair.
DIY Chair Cover Video Update
In the new year once the Christmas rush was over, I added a video tutorial illustrate how easy these chair covers are to make. It’s such a great way to quickly fancy up an old chair using one piece of fabric.
I really like how these dress up my plain kitchen table for the holidays. As they are white and have the hangar at the bottom I will be able to use them any time of year I like by adding a simple little dollar store ornament to the bottom. Say an easter egg or a red valentine. White is just so versatile.

For Christmas I am happy with how they chair covers tie the looks of my rooms together. I have been very busy the last month or so creating various tutorials for adding some style to your decor for Christmas. I hope I have inspired you to add some out of the ordinary ideas to your holiday home as well.
Want to Make this for Yourself or as a Gift? Pin it !

Other Easy to Sew Projects for the Home

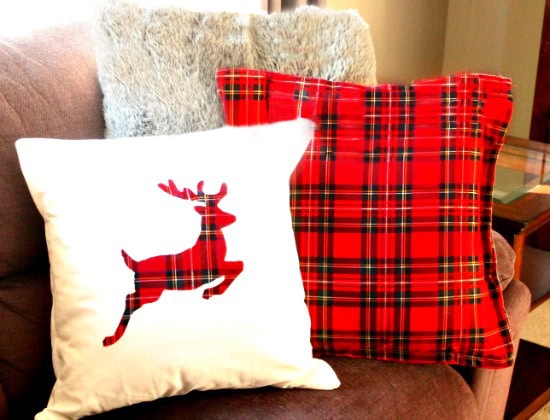
DIY Tartan Chair Covers
Another set of chair covers to freshen our older table set for the Christmas holidays. This set is a little more elaborate and uses more fabric than the simple elegant chair covers do. The red tartan really makes them stand out.
DIY Christmas Cushions of Many Kinds
Its sometimes easier to just DIY a bunch of matching home decor then it is to try and find matching set for the holidays. In this post I share my DIY Christmas cushions.
Someone’s been to Greenland! *wink* *wink* I have the same white glitter Christmas word ornaments on my tree! I remember your lovely tartan chair back covers from last year and these are equally gorgeous, especially with the white Christmas ball hanging from the center. Love your white wintery theme this year, Leanna – so pretty!
Your right lol I got those little word several years ago at Greenland and I love them. I want to see your Christmas tree, I bet its gorgeous. Last year I found the tartan and used it to do the entire house, but truly I prefer the white. Hugs my friend Leanna
Wow! I am quite confident that I can follow the steps. I am not the most adept sewer, but these are simple and yet look so elegant. I love that you can hang a small decorative piece from the triangle. And crazy about all or mostly all white Christmas decor, lately I’ve been gravitating towards such images. Very pretty! Pinned.
Thank you so much Milena. Lots of people shy away from the whites because they think it shows everything. That isn’t so…and whites are much easier to clean than light colours are.
Very lovely. They add a nice festive flair to your dining area. Plus by making them white it will carry through to spring.
Thank you Debra. I tried to make the eating area feel more dining room like. The chair covers are easy to remove, wash and iron.