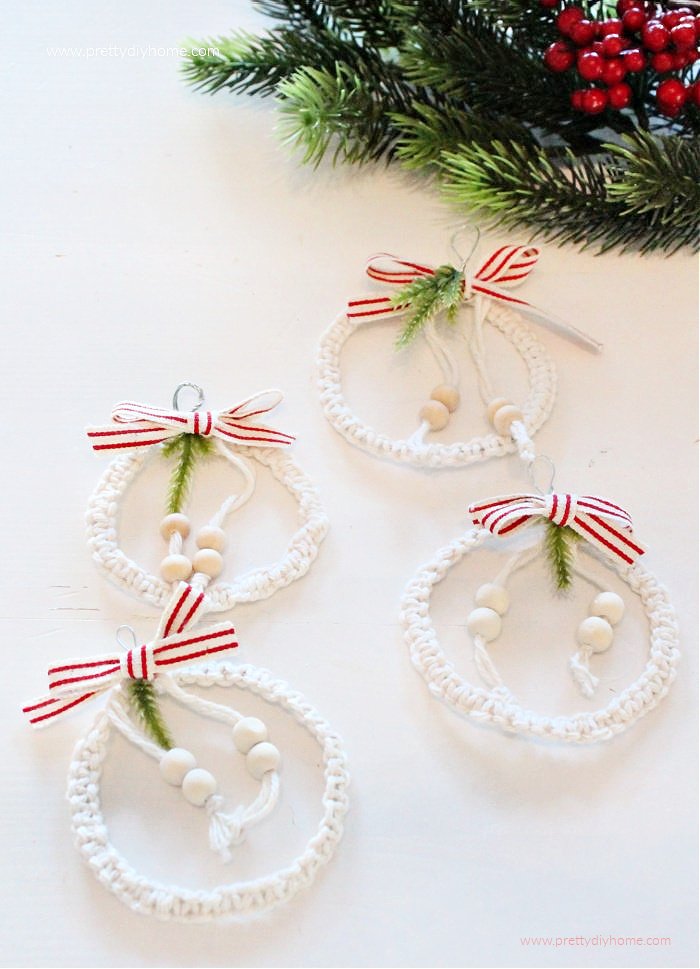
Macrame Christmas Ornament
Easy DIY Christmas Tree Ornament
This DIY Christmas Tree ornament is done with macrame, using just one type of knot, the basic square knot. You can make this macrame Christmas ornament as large and bold or small and dainty as you like. The size depends on the macrame cord you choose, and you can make them for very little. If you don’t know how to tie a square knot I have added a step by step tutorial for the knot farther down the post.
Every year I decorate our Christmas tree with a different theme. Typically starting with a few ornaments from previous years, buying a few new ones, and then realizing at the last minute our Christmas tree has gaps and needs more decorations. Necessity was the inspiration for this DIY Christmas tree ornament. Digging around in my craft supplies, I found everything I needed and made 4 of these little DIY farmhouse Christmas ornaments in 1.5 hours.

Macrame Christmas Ornament Supplies
White cotton wool (20 feet)
Florists wire
Four small beads per wreath
Round object like a canning jar ring.
Tape
How to Make a Macrame Christmas Ornament Wreath
Cut four strips of macrame cord 5 feet long.
Cut a piece of florists wire 24 inches long. Fold the wire in half creating a loop at one end.
Gather the strips of wool together along with the wire. Using the wool tie a loop knot around the wire about four inches from the end.

Separate the four lengths of wool into three groups as shown below. Fasten the top end to a work surface with the tape. Take the two inner pieces of wool and the wire, pull straight and tape the other end about ten inches. Leave the other two lengths of wool one on each side of the inside cords with wire.

Using the outside two cords tie repeating square knots. (step by step square knot tutorial is below)

Tie repeating square knots until the the knots are 9 inches long.

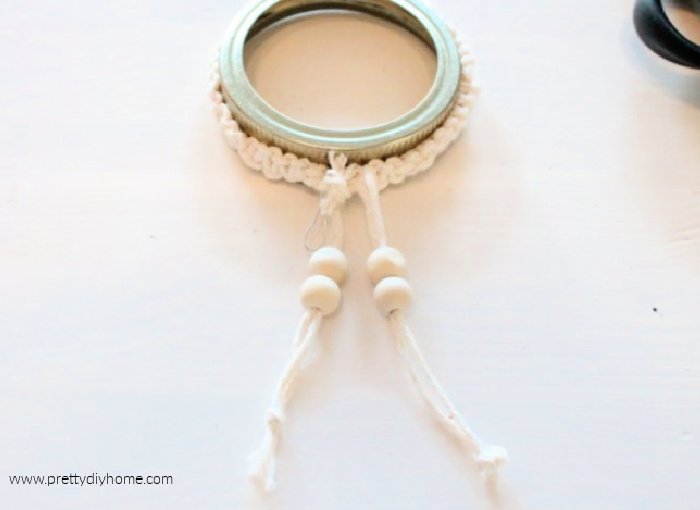
Untape the macrame, wrap around a canning jar lid to form a circle. Connect the ends together by twisting the wires around one another. Trim the wire ends neatly.

Next take the wool and tie into a knot. Cut four pieces of the cord short, then divide the other four lengths into two sections.
My Hack for Threading those Tiny Beads
Before making these wreaths I used to thread beads with a large eyed needle, but this time I had the florist wire sitting right there and voila it worked so well.
Hold two pieces of wool together, then wrap a small piece of wire around the wool, pinch to hold the wool in place and then thread it through the beads.
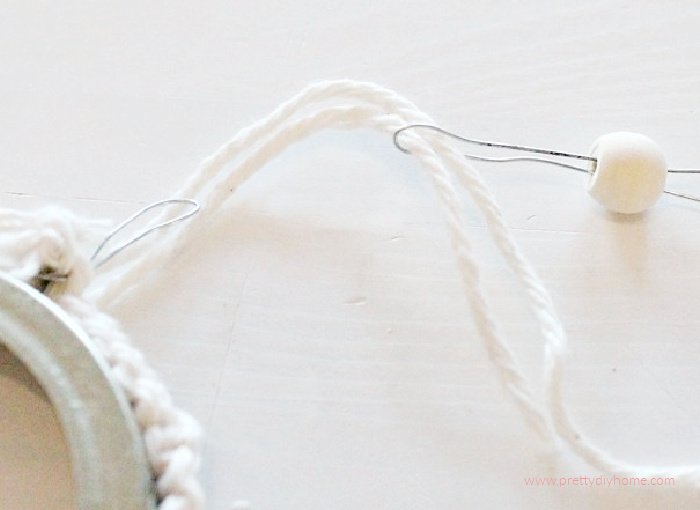
Tie the ends into a knot to hold the beads in place.
Using hot glue seal attach a piece of greenery where the ends are tied together. Tie a small bow with coordinating ribbon glue over the greenery.


Macrame Square Knot Tutorial
This is the most used of the macrame knots. It looks more complicated than it is. The instructions are with larger cord so its easier to see.
Starting with four cords, you will work with the two outer cords and wrap them around the two inside anchor cords.
Step 1 – Take the left outside cord and move it to the right, over the two anchor cords.

Step – 2 Take the right cord wrap it over the newly placed left cord, then push it up through the loop on the opposite side. Pull snug.

Now repeat these steps in the opposite direction.
Step – 3 Take the right cord and move it to the left, over the two anchor cords.
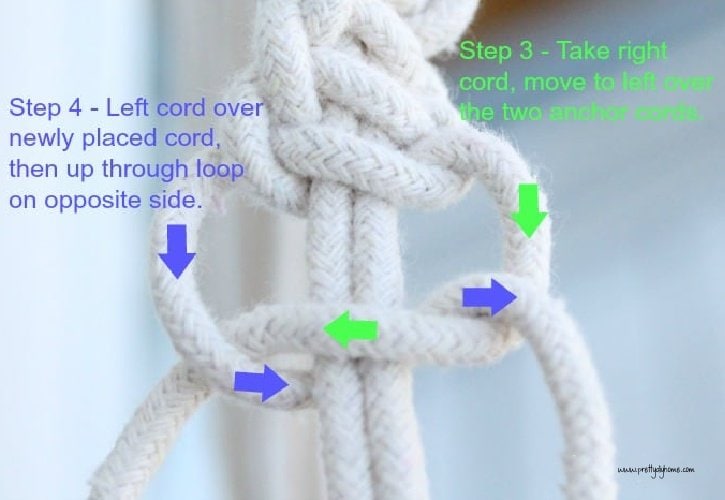
Step – 4 Take the left cord wrap it over the newly placed right cord, then push it up through the loop on the opposite side. Pull snug.
As you repeat the square knot you will get a smooth series of flat knots.
Decorating is by far my favorite part of getting ready for Christmas. Once they are all up and our home is ready I have a hard time messing it up cooking and baking. Oh well.
What’s your favorite part of about getting ready for the Holidays?
Some Other DIY Christmas Ornament Ideas
Every year I try and make at least one Christmas tree ornament, I have a few Christmas ornament ideas to share with you I hope you like. But I will start with the Christmas tree I used the macrame ornaments on first.

Farmhouse Christmas Tree with Lots of Ribbon
I found some fantastic red farmhouse ribbon at Michaels and knew immediately what I wanted to do for our farmhouse Christmas tree. This is one of my all time favorite Christmas trees, I hope you love it as well.
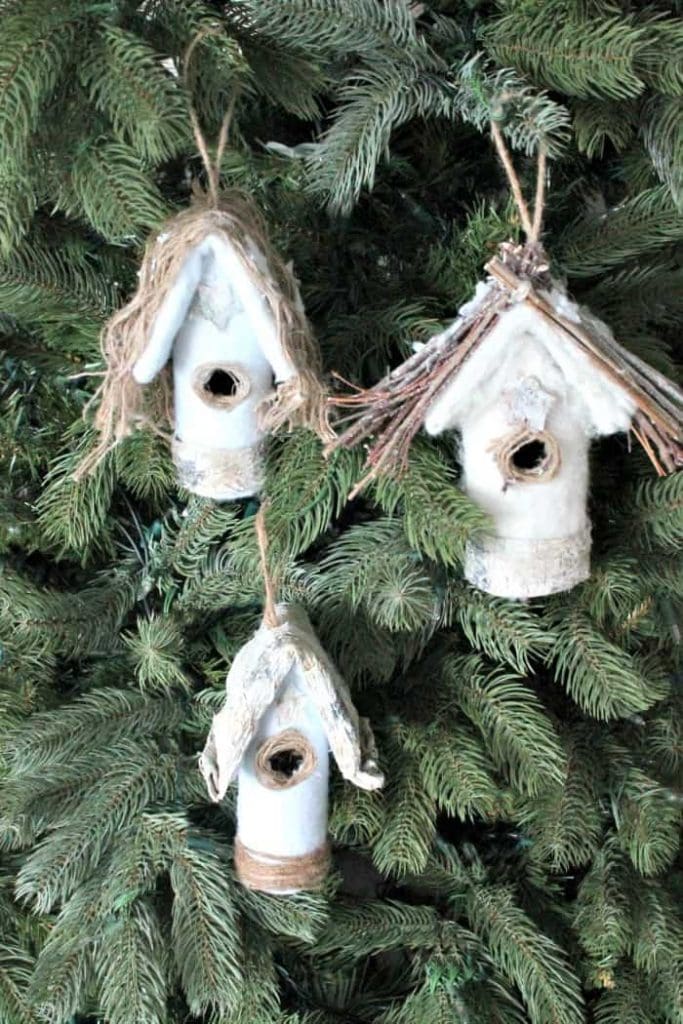
Christmas Tree Birdhouses
These little Christmas tree birdhouses are made with inexpensive materials in three different styles. I adore having birds and birdhouses on our Christmas tree, its a family tradition from when I was very little.
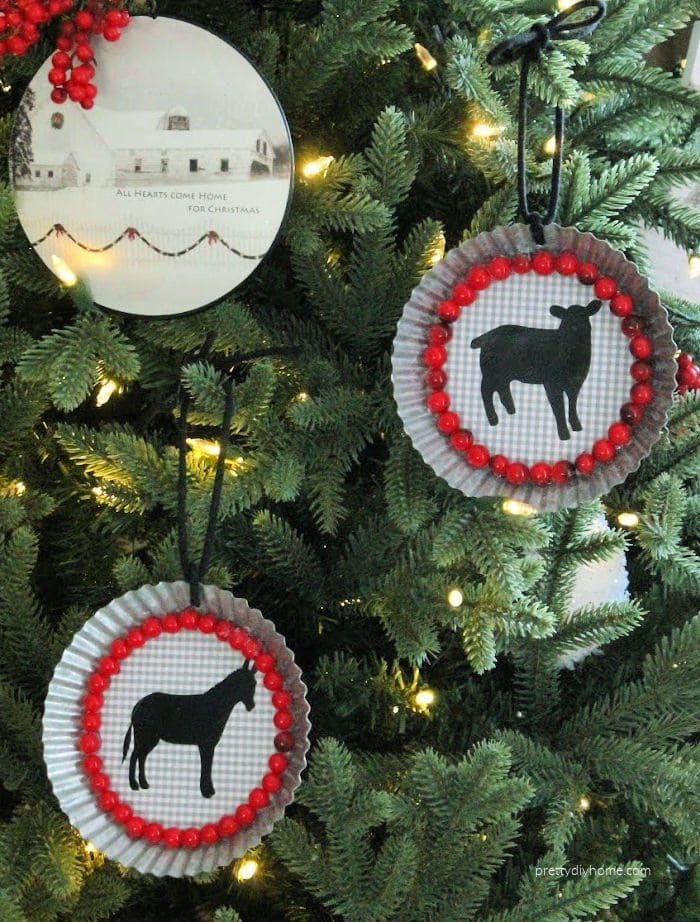
Farmhouse DIY Christmas Ornaments
These Farmhouse Christmas ornaments are a bit different. You don’t need a cutting machine to make them just cut out the free printable animals and place them on a paper backing. Although I adore a farmhouse Christmas tree I avoid having wording all over it so adorable barnyard animals was my choice for these.
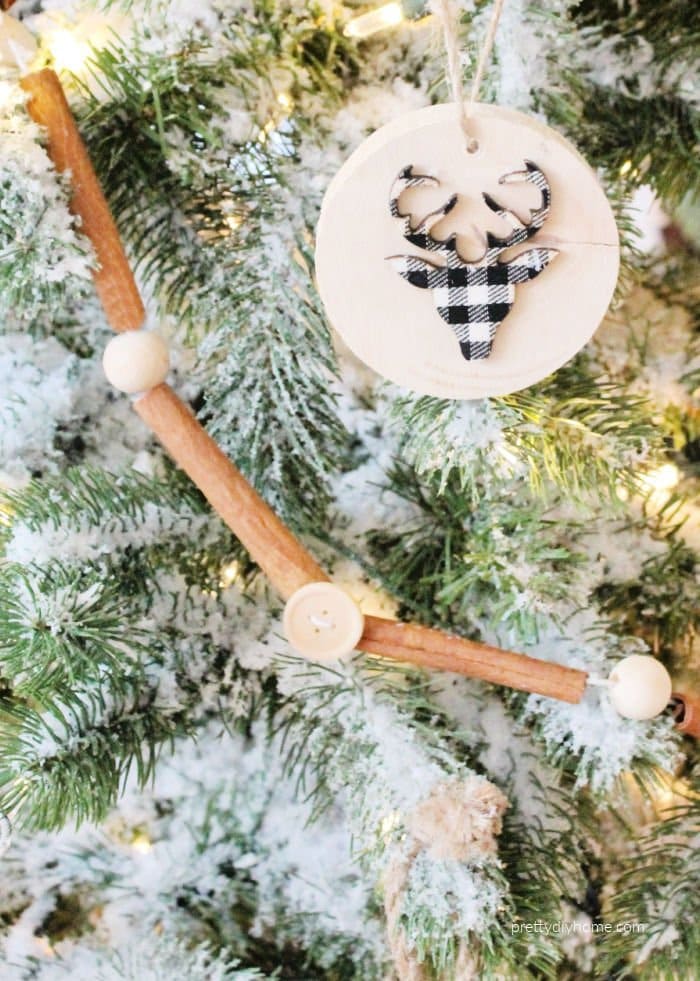
DIY Cinnamon Stick Garland
This cinnamon stick garland is a fantastic idea on an artificial tree, it makes the tree smell so good. It goes very well with a natural decorated Christmas tree, and I am sure you will see it one of my trees again.
it looks lovely and so delicate! beautiful project <3
Very pretty ornaments, Leanna! Gosh, I haven’t done macrame in decades so those knots brought back memories.
Sharing this one with my macrame loving mama.