A Fake Fireplace with Mantel DIY
DIY Faux Fireplace with Mantel
Today we are adding a DIY faux fireplace mantel in our new house. For whatever unimaginable reason instead of installing a real fireplace mantel upstairs, the builders opted for a wood stove in the basement. I am so excited to be doing this home improvement project as I know it’s going to make a huge difference. The DIY faux fireplace is a great way to provide a great focal point in our living room and give me a pretty mantel to decorate for the holiday season. The heating stove remains hidden in the basement, solving that eyesore will have to wait for another day.
This post has very complete step-by-step instructions that may make this project seem more complicated than it is. It didn’t take a long time to build. The two of us built our faux fireplace in one day, even with Hubs having a broken right wrist and cast. Then two days to refinish and tile it. replace in one day and it took two days to refinish and tile it. Our faux fireplace dimensions will likely be different than yours, but we included instructions for measuring so you can do the same thing with any fireplace surround you fall in love with.
Choosing the DIY Fireplace Location
Our living room is boring, with one very long wide blank wall with two electrical plugins making it perfect for a faux fireplace. In your own home, the first step before buying your fireplace surround is to find the right place for it. It should be on a wall where it could be the focal point, and it should be centralized to provide balance. There are numerous places you can place a faux fireplace, but having the spot in mind makes it easier to choose a fireplace the right size for your home. We have been doing way too many renovations in this house so we can’t afford the extra cost of an electric insert right now, but an electric outlet is nearby when we do decide to add one.
Finally, we built this faux fireplace so it’s movable and not permanent if we ever decided to sell and move on.
Choosing the Right Fireplace Surround
After finding the right spot and having a general idea of the size and style of your own fireplace, you need to find a fireplace surround for an affordable price. It took a while to find the right one, but it was worth the wait. We found this fireplace surround for $50 on a marketplace Facebook page and I love it. The best part was its stylish farmhouse look and the surround is quite large.
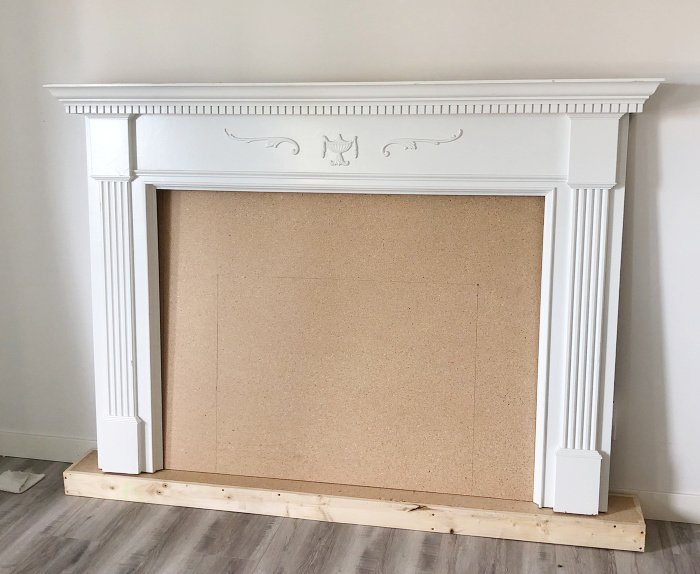
The second step was to measure the faux fireplace mantel surround for a base, insert, and the depth we needed. As our living room is small I didn’t want the base any deeper than 8 inches or it would impact traffic flow through our small room.
Supplies for a Fake Fireplace
I have added links with examples of what we purchased at Home Depot, they aren’t affiliate links.
1 – 4 by 8 sheet of 1/2″ MDF board panel (this was the least expensive smooth wood we could find that is 1/2 inch thick.
2 – 1 by 4 lumber, 8 feet long
1 – 1 by 3 lumber, 8 feet long
Acrylpro Tile Adhesive (not an affiliate link)
White Non-Sanded Grout (not an affiliate link)
7 – L brackets 3″ and wood screws
120 grit & 180 grit sandpaper
Dap Caulking in White (not an affiliate link)
Latex paint – We had Sherwin Williams Extra White on hand from baseboards so we used 1/4 gallon of it, and some Binz 123 primer.
Measuring and Building the Fireplace Base
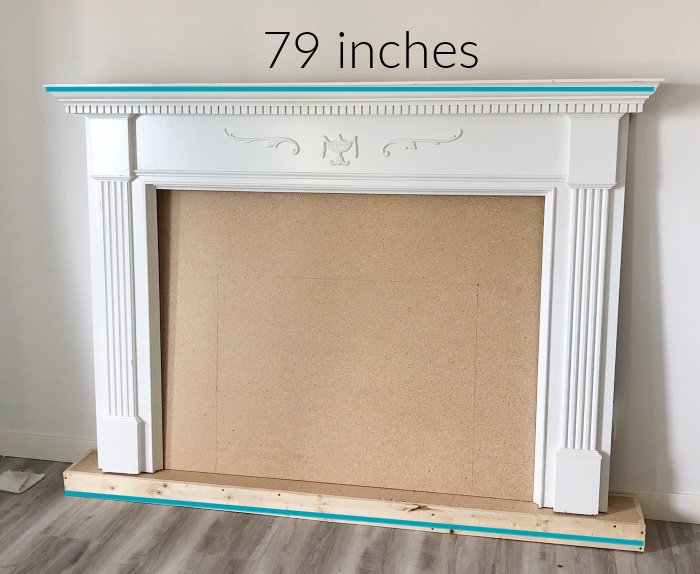
We decided to make the base the same width as the mantel which came out to 79″.
Cut Lengths for Base
2 – 1 by 4 cut 79″ long for the length
2 – 1 by 4 cut 7″ long for ends
2 – 1 by 3 cut 7″ long by cross bases
1 piece of MDF board 77 1/2″ by 7″

After cutting all the lumber to length, place the two 79″ lengths parallel to each other. Place the two end pieces between the 79-inch boards as shown below.
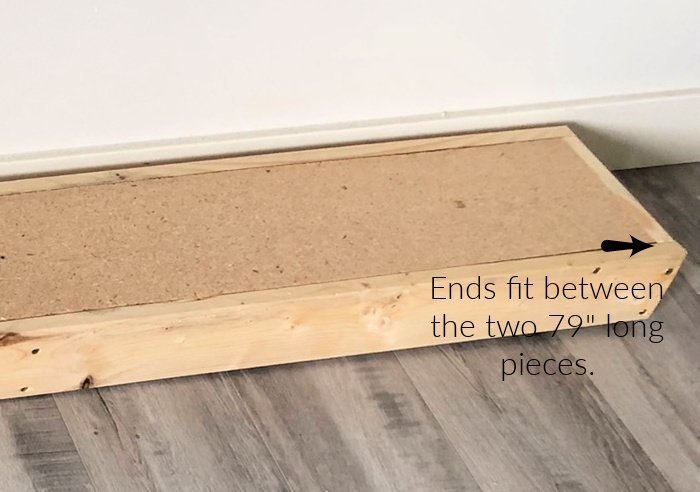
Using wood screws, screw the two short ends to the two long pieces.
Once the ends are connected put in the two cross pieces making sure that there is room at the top as the MDF board will slide down into the frame.
Measuring the Size of the Fireplace Insert
Once the base is built start building the actual fireplace insert that goes between the opening on the fireplace surround as shown.
Cut the MDF to size with either a skill saw or a table saw. We used a table saw.
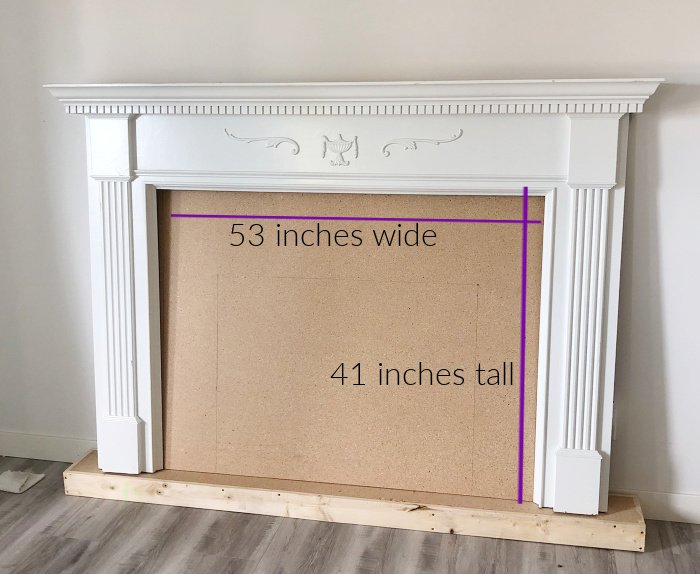
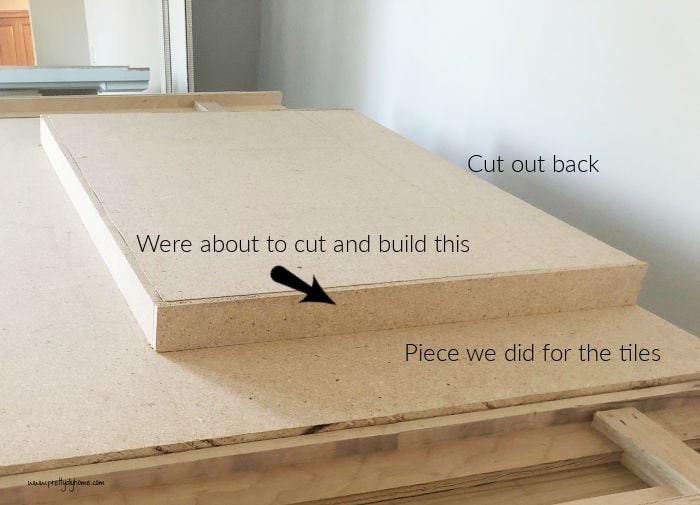
Once you have the surround cut out, you need to decide how large you want the faux opening to be, and how wide you want the front coverage (tiles/bricks).

In the picture above you will notice an outline of about one inch around the outside of the large MDF board. Our fireplace surround had a slot on the backside for the front to fit into. Your fireplace surround may have something different.
This is how we decided on our tile placement. You have to decide how deep you want your opening to be depending on the depth of your base, fireplace surround, and mantel. If you want to keep it flat don’t cut out the insert section. Just paint it a dark color and tile around it.
We chose to cut out the insert to make the faux fireplace box deeper. If you choose to cut it keep the cutout piece of MDF for the back.
Building the Faux Fireplace Box
The piece you cut out from the fireplace front becomes the back of the box. Here is an image to help orientate you.
We found it much easier to build and assemble the fireplace by placing it up on a flat work surface first.
Next, we need to cut three pieces of MDF for the two sides and the top of the faux firebox. We do not need a bottom as it fits against the base. Our opening is 2″ deep.
Note: When deciding the depth of your faux firebox, you need to be aware of the depth of your mantel. If you want a deeper firebox you can create it, but you may have to add a strip to the back of your mantel and camouflage the joint. I mention it just because I don’t want you to be surprised by a problem at the final stage.
We cut the following 3 pieces of MDF board.
2 pieces – 2″ by 28 1/2″ for the two sides
1 piece – 2″ by 36″ for the top
Once cut, line them up with the back, apply the wood glue, and nail them into place. We used an air nailer but small nails or a brad nailer works as well.
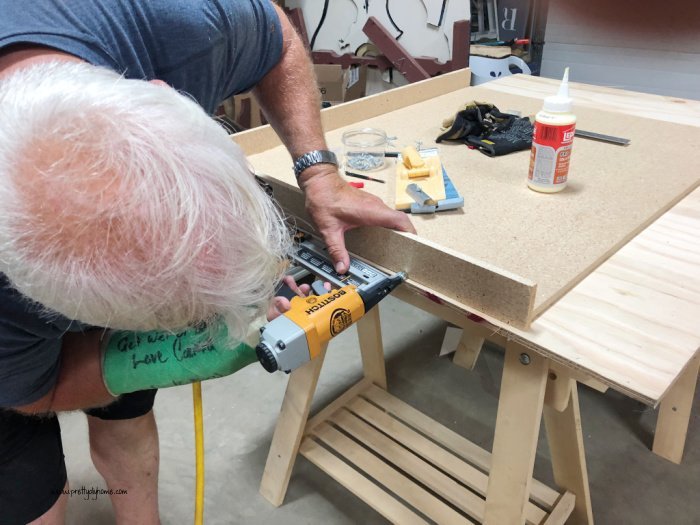
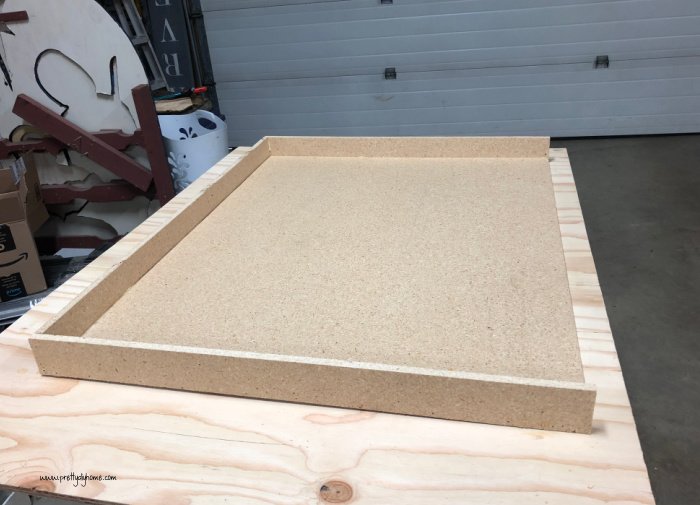
Here’s the finished box.
Assembling a DIY Faux Fireplace
Now that we have the faux firebox, the front for the tile, and the surround with the mantel all done, we need to assemble everything before finishing.
The project started to get heavy for us just two of us to move, so we moved the fireplace into the living room before assembling and starting to tile.
Next, glue the front edge of the firebox to the wood front and nail it in place. (my bad I have no image).
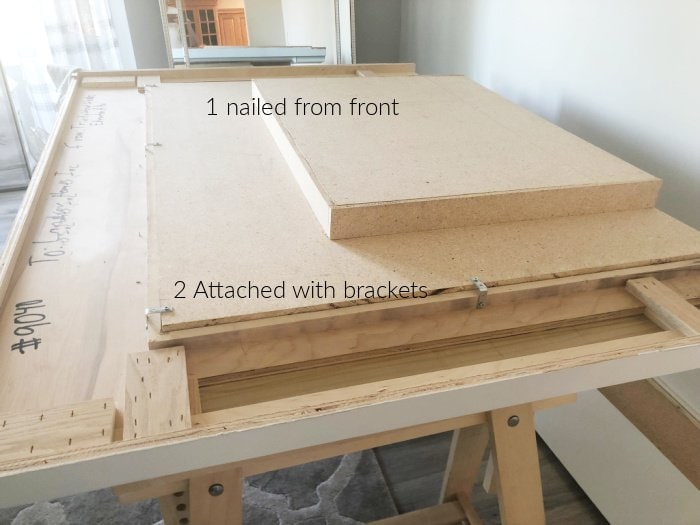
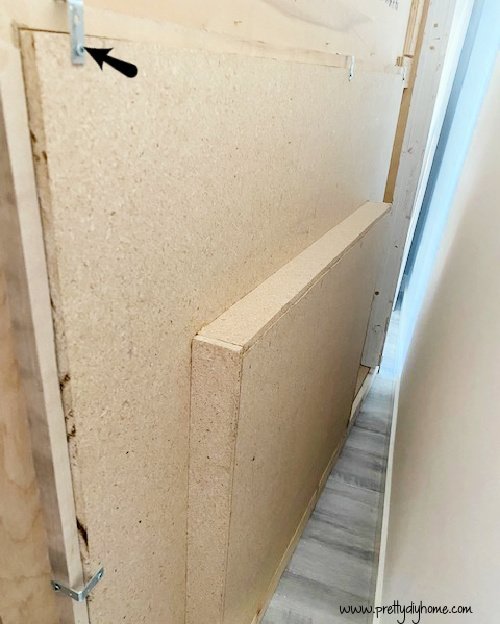
Once the fireplace box is attached to the front, lay the front with the box attached to your fireplace surround. You can glue and brad nail it, but we found it easier to glue and use 7 L brackets and wood screws to hold it in place.
Here is another angle of the brackets from the back of the fireplace.
Once we had the basic structure built, it was time to think about the finishing touches. As we already had the white fireplace surround we had to think about how we wanted to put the finishing touches on the hearth, the front of the fireplace, and the fake firebox.
Tiling the Faux Fireplace Surround Front
I gave up the faux brick idea right away in favor of tile. There are a few things to consider when purchasing tile for a faux fireplace. Can it be cut? Do you want to be cutting tile? What’s the budget? What color do you want? How much material do you need to cover the front surface of the fireplace? Do you want to tile the firebox, or not?
Before shopping we made the following decisions.
We can cut the tile, the budget is $150 (Canadian), we want dark grey or black tiles not bigger than typical subway tiles, and we need 15 – 20 square feet of tile material. We decided NOT to tile the firebox as I am still thinking about painting a fire image for the firebox area, and eventually an electric fireplace insert.
Starting at Home Depot and Lowes we looked at sand local availability, then made notes and went to the thrift stores to see if we could find either enough material or some material that matched what they had in the department stores. We found tile at Habitat for Humanity. I freaked out when we found enough matching penny tiles in 12 by 12 sheets. We got them for 25% of the original cost so $6 each at Habitat.
The great thing about this penny tile is it comes in 12 by 12 connected sheets so no individual tile setting, but we don’t know how to cut or have the equipment to cut it. We decided to place the tile so that one edge would not be even.
Lay your tiles out to decide on pattern and placement before adhering them. Take loads of pictures for reference and then put your tiles back.
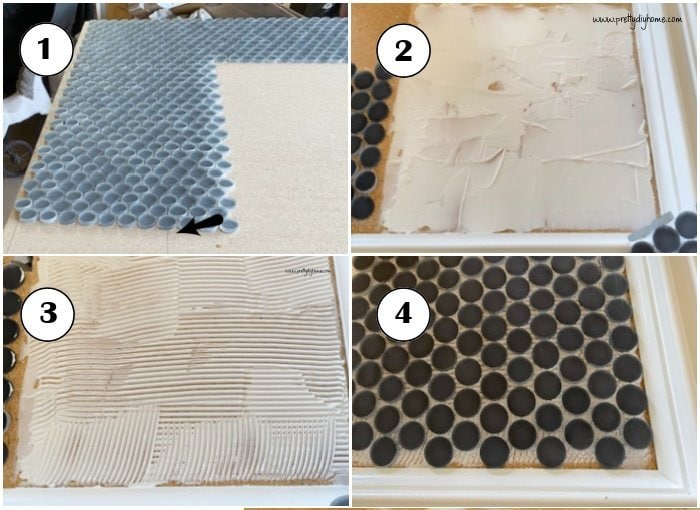
Spread tile adhesive using a putty knife where you want your tile. Do it in 1-foot square or smaller sections. Spread the adhesive about 1/8″ thick, and don’t fret about smoothness, just stay within the tiling area.
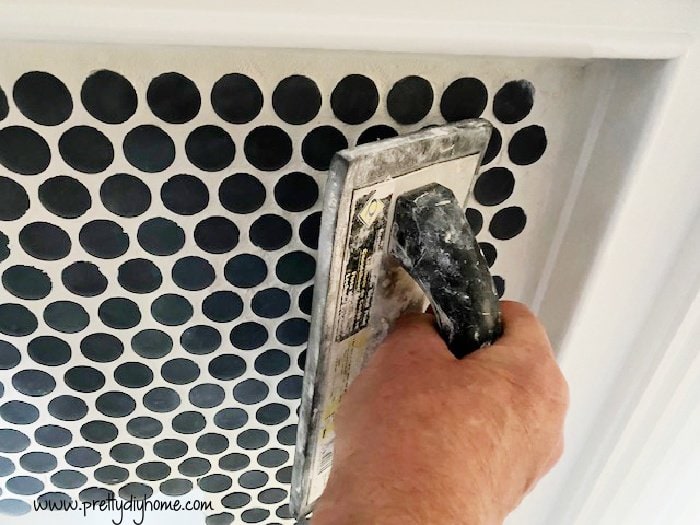
Once the tile adhesive is spread out. Pass a notched trowel over the adhesive keeping it as flat as possible. The trowel will remove about half the adhesive.
If cutting, cut your tile to size, and lay the tile onto the adhesive. The tile won’t stick immediately so you can adjust it into place.
Start the next section by repeating the steps. You will see the tools Hubs used.
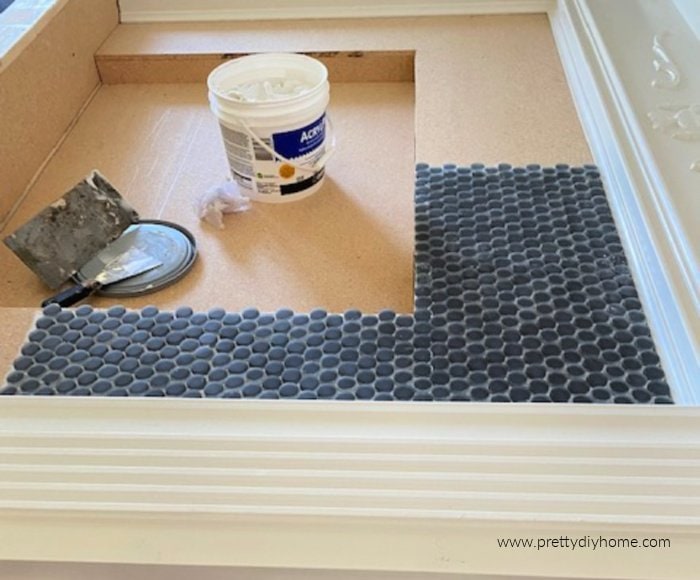
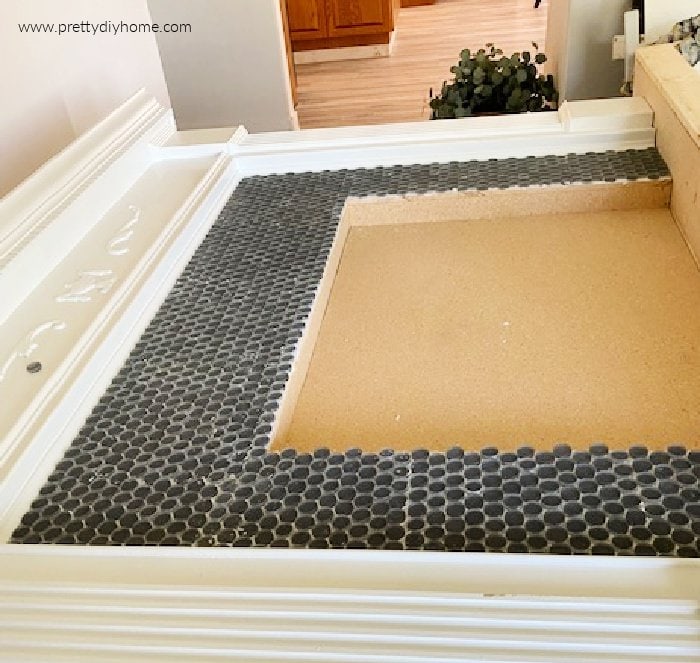
We learned that the staggered edges looked okay. We were able to save enough tiles to do the base, by cutting and fitting in sections of the 12 by 12 sheets.
Grouting the Tile
We let the tile dry overnight before applying the grout. We thought about dark grey or black grout, but as the room itself is dark we opted for a white non-sanded grout. I think black grout would be gorgeous on this type of tile.
The easiest grout to work with is pre-mixed, so we suggest using pre-mixed nonsanded grout. Apply the grout into the voids between the tiles, for our penny tiles we used much more grout than you would for other styles of tile. The process is the same you just keep applying grout until the cracks are smooth.

Grout can dry quite quickly but it depends on the product and how moist it is. Work in small areas like you did the tile.
As you do each section once the grout is applied use a large damp sponge to wipe off the access grout leaving the tile exposed. Repeat until is cleaned off. Hubs has a handled sponge as he has done a few tiling projects. You can use a really large sponge if you have one on hand.
Once Hubs removed all the grout and made it smooth, I went with a damp rag and spent some time wiping each penny tile making sure it was cleaned right off and perfectly round. It took two hours for the penny tiles, which was a labor of love but I adore having them. For other tiles, you may be able to skip this step.
Final Faux Mantel Finishing
Our fireplace surround came with glued-on decorative accents that were covered in glue and paint blobs, we took them off and sanded everything smooth with 180-grit sandpaper.
We filled any nail holes with wood filler, let it dry, and sanded it smooth, by hand with sandpaper. Next, we painted the unfinished wood firebox and the outer edge of the base with one coat of primer and one coat of white paint. We used Sherwin Williams Extra White (1/4 gallon), and 1 cup of Binz 123 Primer.
In the remaining already painted areas we sanded to scruff up the paint with 120 grit paper, skipped the primer, and gave it one coat of Extra White. If you want a different color or your fireplace surround is dark you may need a couple of coats of paint, white on white made it easy.
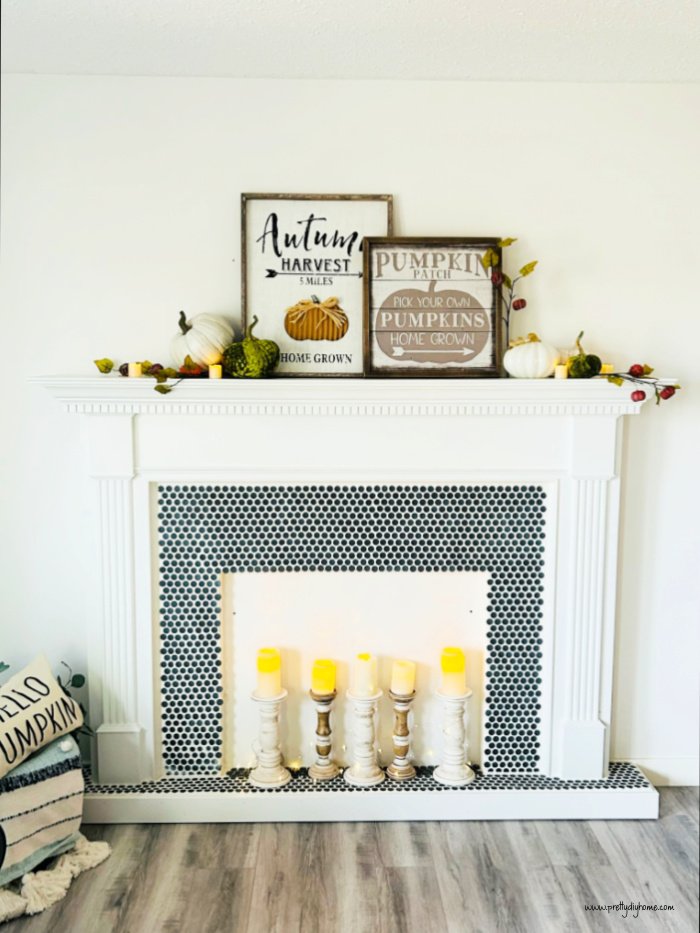
Filling the Firebox
The final step is to fill the firebox and decorate the mantel. To fill the firebox I chose to use flameless candles and mini lights, but you can use logs and twinkle lights, an electric insert with faux logs, or painted-on flames. For now, we kept the firebox white, we may update it with a shiplap or a mirror, or paint a fire in it. As I was so undecided I chose to leave it plain and sit with it for a while. It adds so much character to the boring living room, that it’s hard to describe, it just has a huge impact on how the room feels. I just know I am going to have so much fun decorating that new mantel.
As this home doesn’t have the right spot to add a piped-in dream fireplace, this beautiful fireplace does all it needs to in this home. It instantly gave the living room a focal point and the rest of the room a cozy look. This fireplace can be moved around like a piece of furniture, making rearranging the tiny living room so much easier for the holiday season. And if you move, you can give the new owners the option of keeping the fireplace mantle or not. (although I don’t know why they wouldn’t want it).
Other DIY Faux Fireplace and Mantel Ideas
There are so many different options for faux fireplaces and mantels. You can make a faux fireplace for such a reasonable amount I think building one is the perfect opportunity to see if you want to invest in the real thing or not.


Other Fireplace Related Ideas
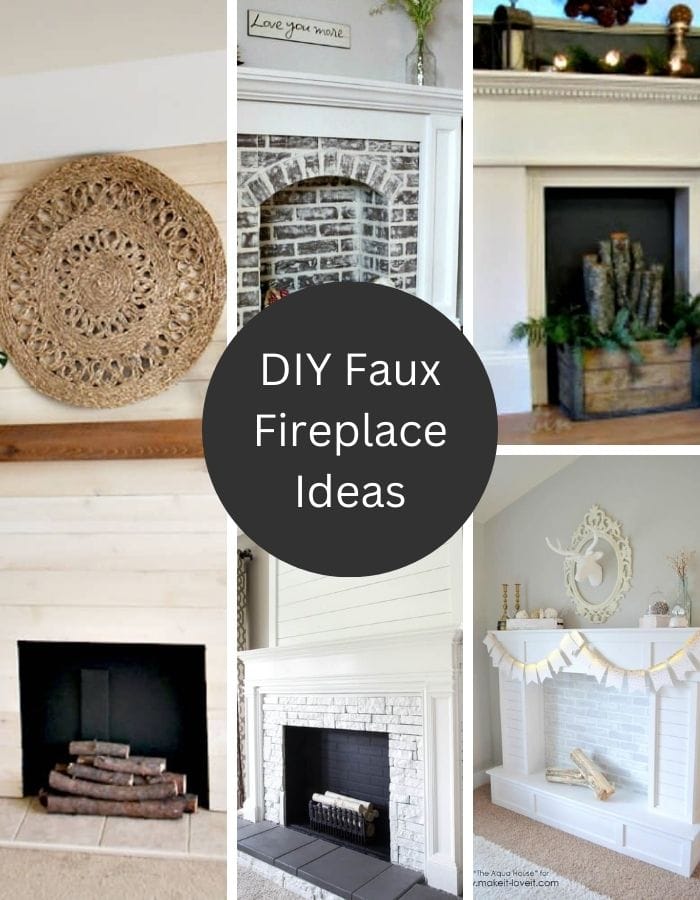
DIY Faux Fireplace Ideas
Here is a selection of other fake fireplace DIYs I collected. So many different ways to have a mantel and fireplace, with ideas for filling the fake firebox as well.
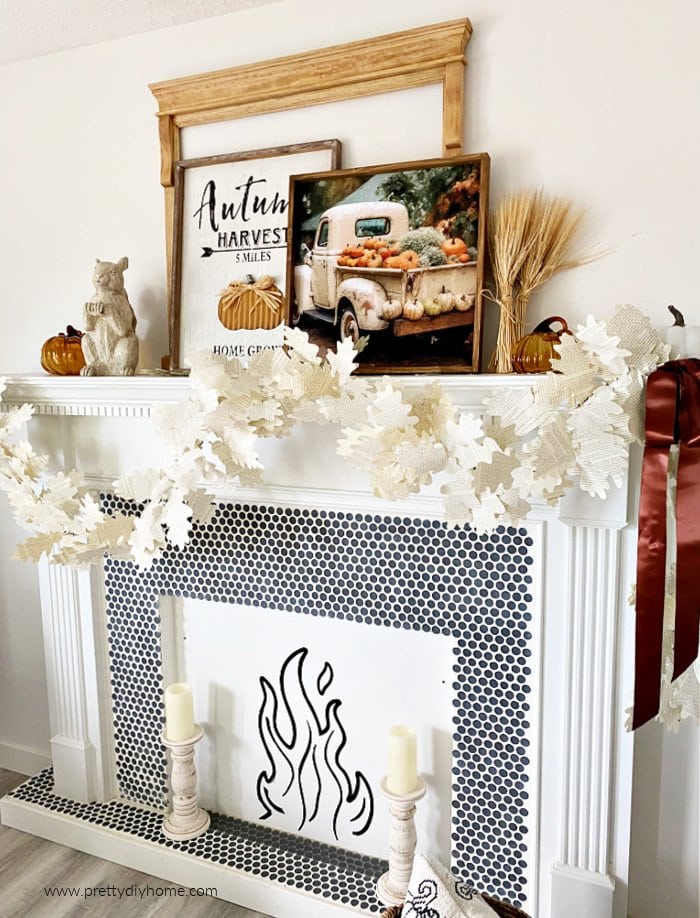
Fall Mantel Garland
Here is the mantel decorated for Fall with a Cricut Book Page Craft Banner. I have since used the Cricut and black vinyl to make a large fire decal.
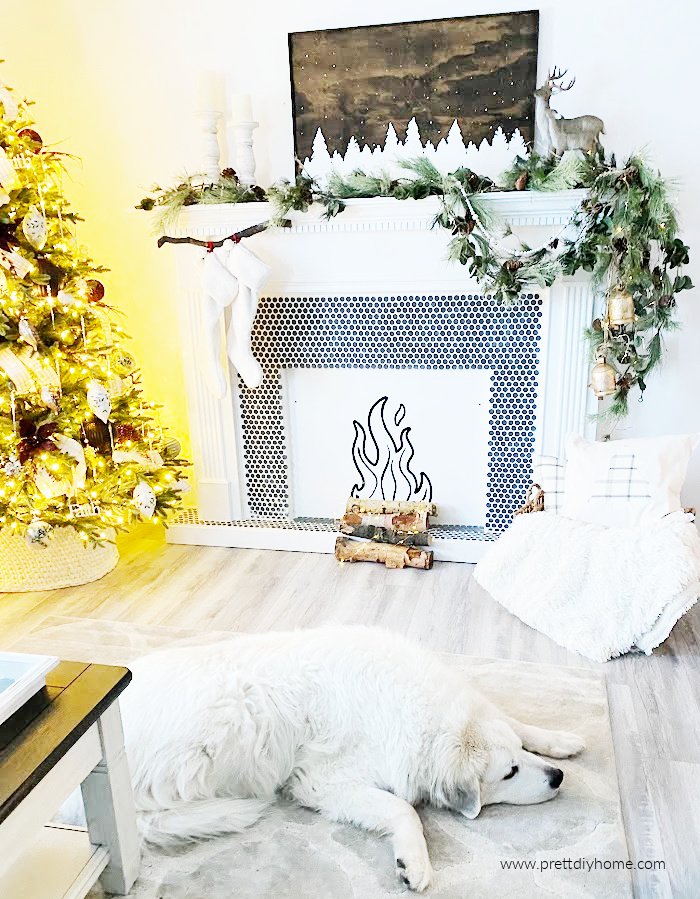
Neutral Rustic Christmas Mantel
Here you can see the same DIY Faux fireplace in Neutral Rustic Christmas Mantel Decor but now I have removed the candles and added twinkling lights and logs.